Module Installation #
Before installing the module, take a backup of your database and files.
- In your JoforceCRM, go to User profile → Settings → Modules → Import Module from Zip.
- Click on Select from My Computer and browse the downloaded pack.
- Enable the checkbox and click on Import.
- Then check the accept license agreement checkbox and click on Import Now.
Configuration #
Integrate MailChimp in CRM #
To integrate your Mailchimp account in CRM,
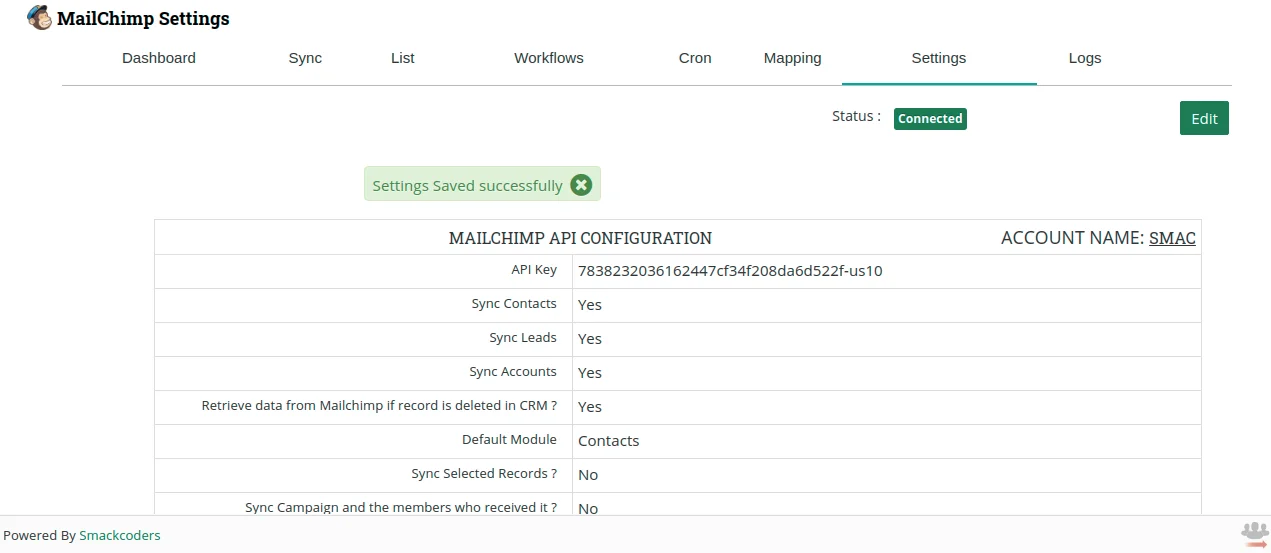
- Go to Mailchimpplus → Settings → Edit.
- Give your Mailchimp API key.
- Enable/disable Leads, Contacts and Accounts modules to sync data between Joforce CRM and Mailchimp.
- Enable Sync Selected Records? to allow only selected records to be involved in the sync process.
- To sync selective records, go to the records edit view and check the Sync to Mailchimp field in Mailchimp information.
- To sync all records only as CRM Leads or Contacts or Organisations, choose the value in Default Module.
- To sync your records alternatively as Leads, Contacts, or Accounts, create Custom fields in your Mailchimp account.

Cron Setup
To schedule your records sync between JoforceCRM and Mailchimp, you need to configure Cron.
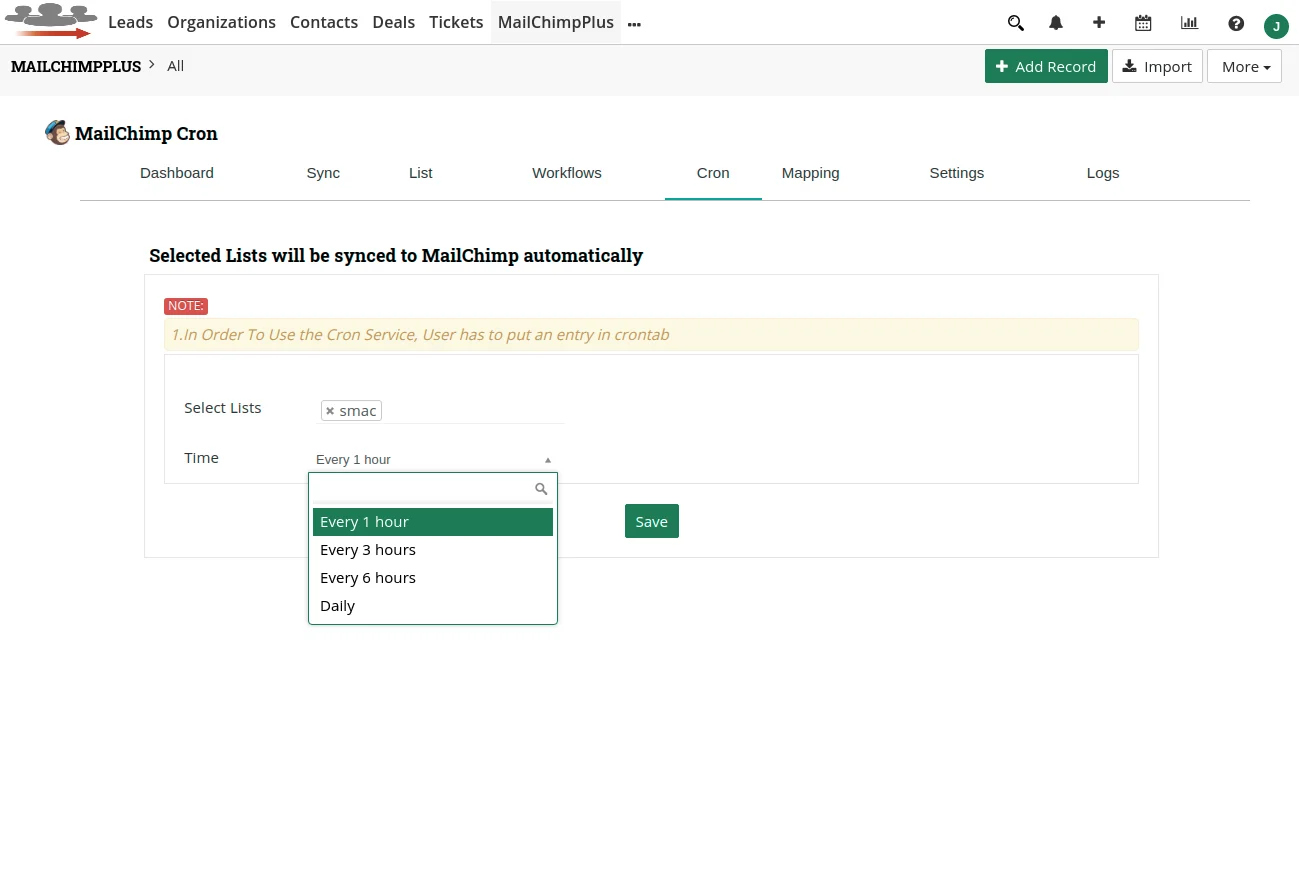
- Navigate to MailchimpPlus → Cron
- Choose all required List and the frequency of time to attempt sync.

Installation and Configuration #
Module Installation #
Before installing the module, take a backup of your database and files.
- In your JoforceCRM, go to User profile → Settings → Modules → Import Module from Zip.
- Click on Select from My Computer and browse the downloaded pack.
- Enable the checkbox and click on Import.
- Then check the accept license agreement checkbox and click on Import Now.
Configuration #
Integrate MailChimp in CRM #
To integrate your Mailchimp account in CRM,
- Go to Mailchimpplus → Settings → Edit.
- Give your Mailchimp API key.
- Enable/disable Leads, Contacts and Accounts modules to sync data between Joforce CRM and Mailchimp.
- Enable Sync Selected Records? to allow only selected records to be involved in the sync process.
- To sync selective records, go to the records edit view and check the Sync to Mailchimp field in Mailchimp information.
- To sync all records only as CRM Leads or Contacts or Organisations, choose the value in Default Module.
- To sync your records alternatively as Leads, Contacts, or Accounts, create Custom fields in your Mailchimp account.
 Cron Setup
To schedule your records sync between JoforceCRM and Mailchimp, you need to configure Cron.
- Navigate to MailchimpPlus → Cron
- Choose all required List and the frequency of time to attempt sync.

#
Mailchimp Custom Field Creation #
- Create custom fields to assign the records as Leads, Contacts or Accounts. The name of the custom field should be VTMODULE. The values can be Lead, Contacts, or Accounts.
- Assign the value for each record or list of records. If the values are not assigned then the records will sync based on the default settings in JoforceCRM Mailchimp Plus Integration.
- Custom fields need to be created for each and every Lists separately.
Create Custom fields #
Follow the steps and create custom fields in Mailchimp
- Choose a List → Settings → List fields and |MERGE| tags

- Then create the custom field VTMODULE

