Initially, you need to prepare a XLS file with Joforce module fields and record values to import on the selective module in Joforce.
Import via Supreme Import Extension #
If you have created a .xls file you can proceed to import.
- Go to Tools → Supreme Import.
- Select ‘Add Supreme Import’ to create a new import.

Upload File #
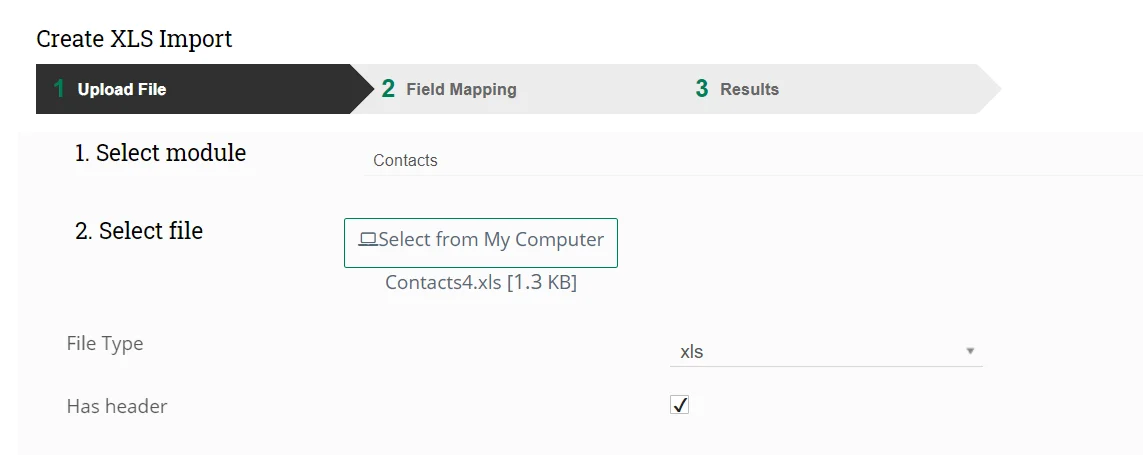
- Here choose the module where you need to import records.
- Click ‘Select from My Computer’ and upload .xls file from your desktop.
- Once you have uploaded your .xls file, it’ll auto-populate fields like ‘File Type’ and ‘Has header’.
- File Type- shows the type of file you upload.
- Check the ‘Has header’ checkbox if your .xls file has headers. The header is mapped with the corresponding JoforceCRM header.

- Duplicate Handling
- Enable the duplicate handling if you want to check & skip duplicates while importing the records in JoforceCRM.
- Once you enable it, choose ‘Skip’ in ‘Duplicate Handling’ dropdown to skip duplicates if it is found.
- Select fields from the dropdown of ‘Fields to be matched on’ to check duplicates for those fields.

- In ‘More Settings’,
- Enable trigger workflow – to turn on trigger workflow of the module.
- Enable create picklist values- create a new picklist value if there are more values for a field.

- Click Next.
Field Mapping #
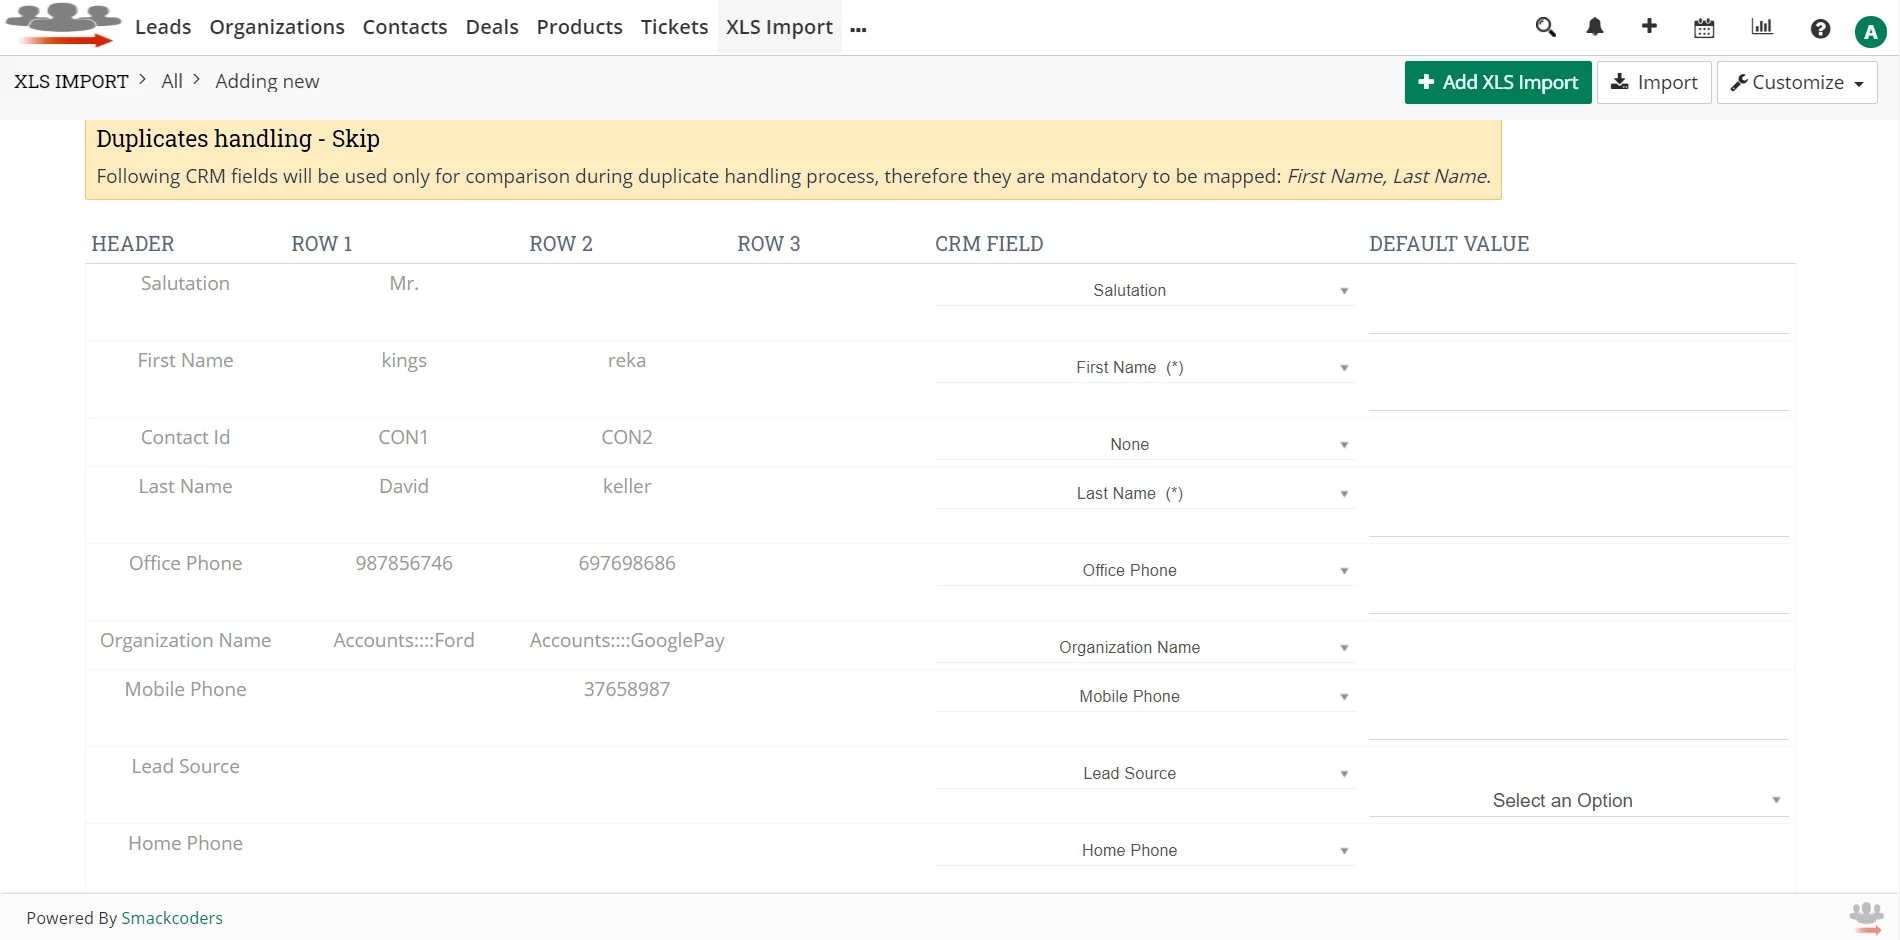
Map the XSL field with the appropriate JoforceCRM fields.
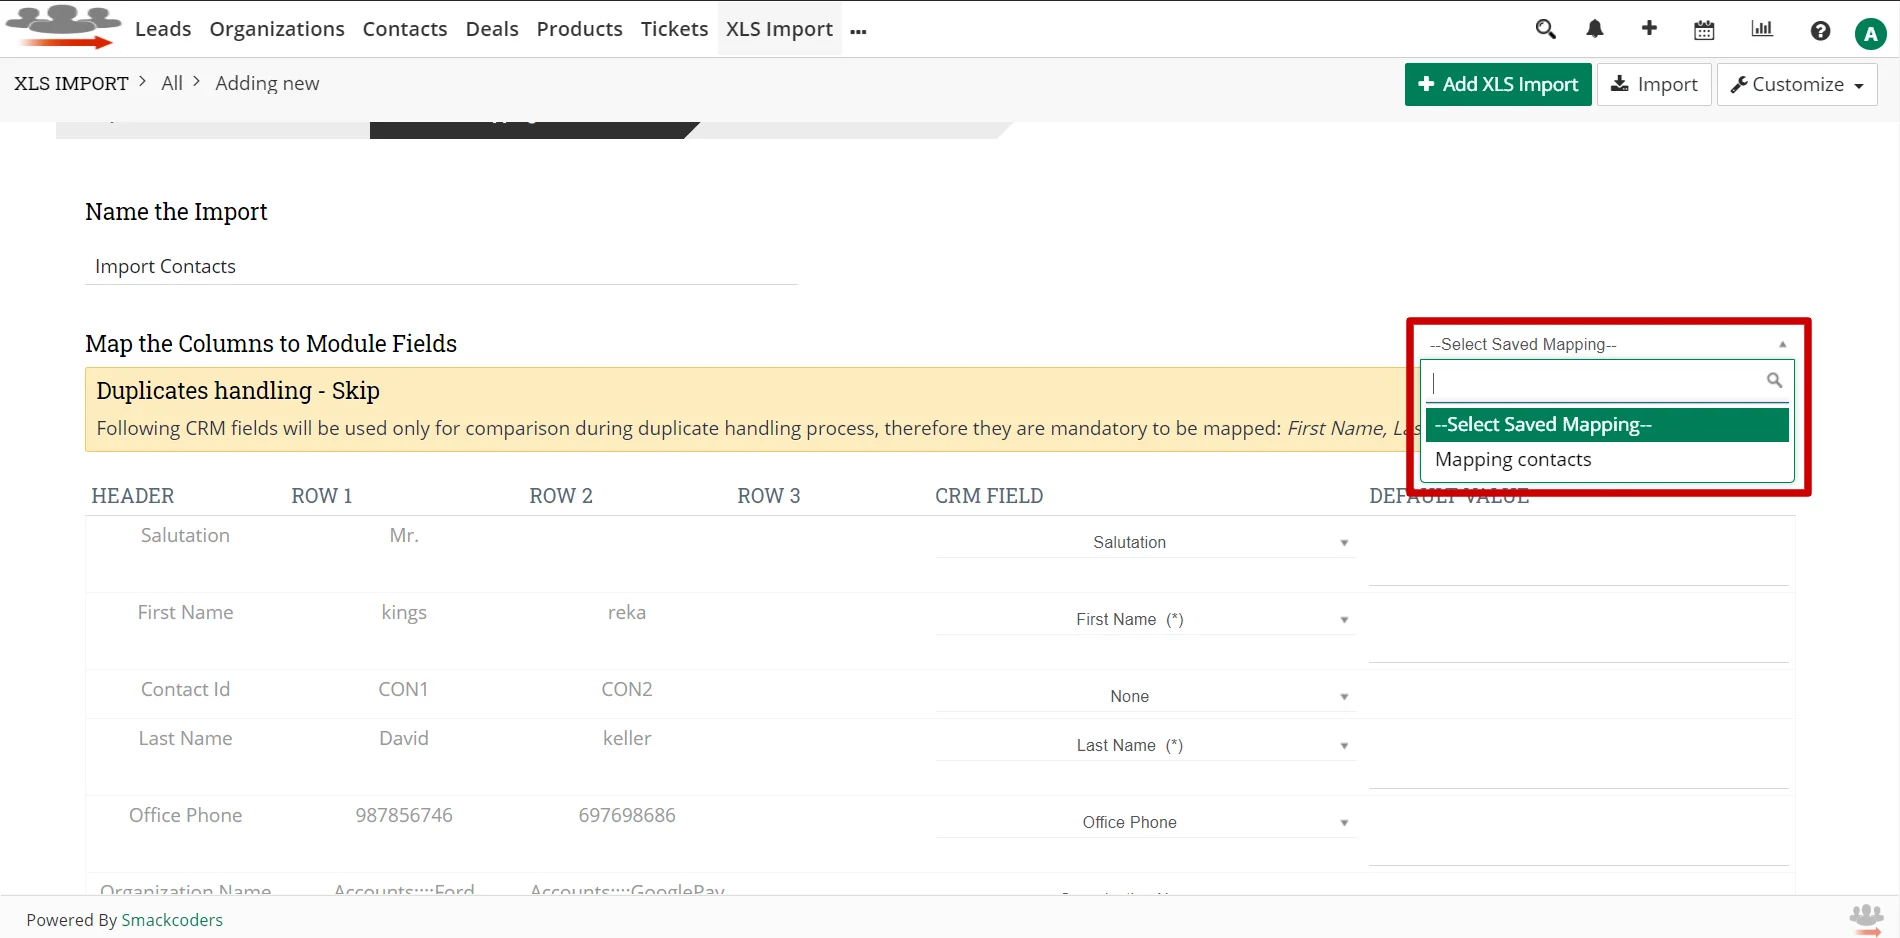
- Provide a name to the import.

- Select your previously saved mapping from the ‘select saved mapping’ dropdown.

- It automatically maps all the fields. You can also change the mapping for the field if you require.

- Set the default value for mapping.
- To save this mapping as a template for future use, simply enable the ‘Save as Custom Mapping’ checkbox and provide a name to it.

- Click Import to proceed importing.
