Leads are the unqualified prospects who are interested in your product or service or any other.
Adding new Leads #
The very first step of your sales process is getting your Leads inside Joforce CRM. This can be done in different ways.
- Adding Lead info Manually
- Click on Add Lead button in the List view
- Provide the necessary details
- Click on Save
- Using Quick Create
- It lets you quickly add lead information from anywhere in Joforce CRM. It is placed in the Quick Actions Bar and you can access it anytime.
- Click on the + icon in the top menu bar
- Choose Lead from the drop-down
- In the Quick Create Lead popup, add the related information
- Once done, hit Save
- You can also access the complete Lead Form right from here by clicking on Go to full form.
- Importing Leads from Existing Files
- You can get all your existing lead information from different sources into Joforce CRM. With the built-in import option, you can import all your Lead info in bulk.
- Click on the More option and click Import from the dropdown menu.
- Gather the list from different sources and convert it into a CSV file and import it all in one in just a click.
- Automatic capture of Leads from website
- Capture all your website visitors and turn them into your Joforce CRM Leads. When your prospects fill out any Webform on your website all their information is captured automatically and Lead records are created in Joforce CRM.
- Create Leads from sales email
- With Mail Convertor, you can configure your mailbox and it automatically scans all your emails and creates Leads in Joforce CRM.
Default Lead fields #
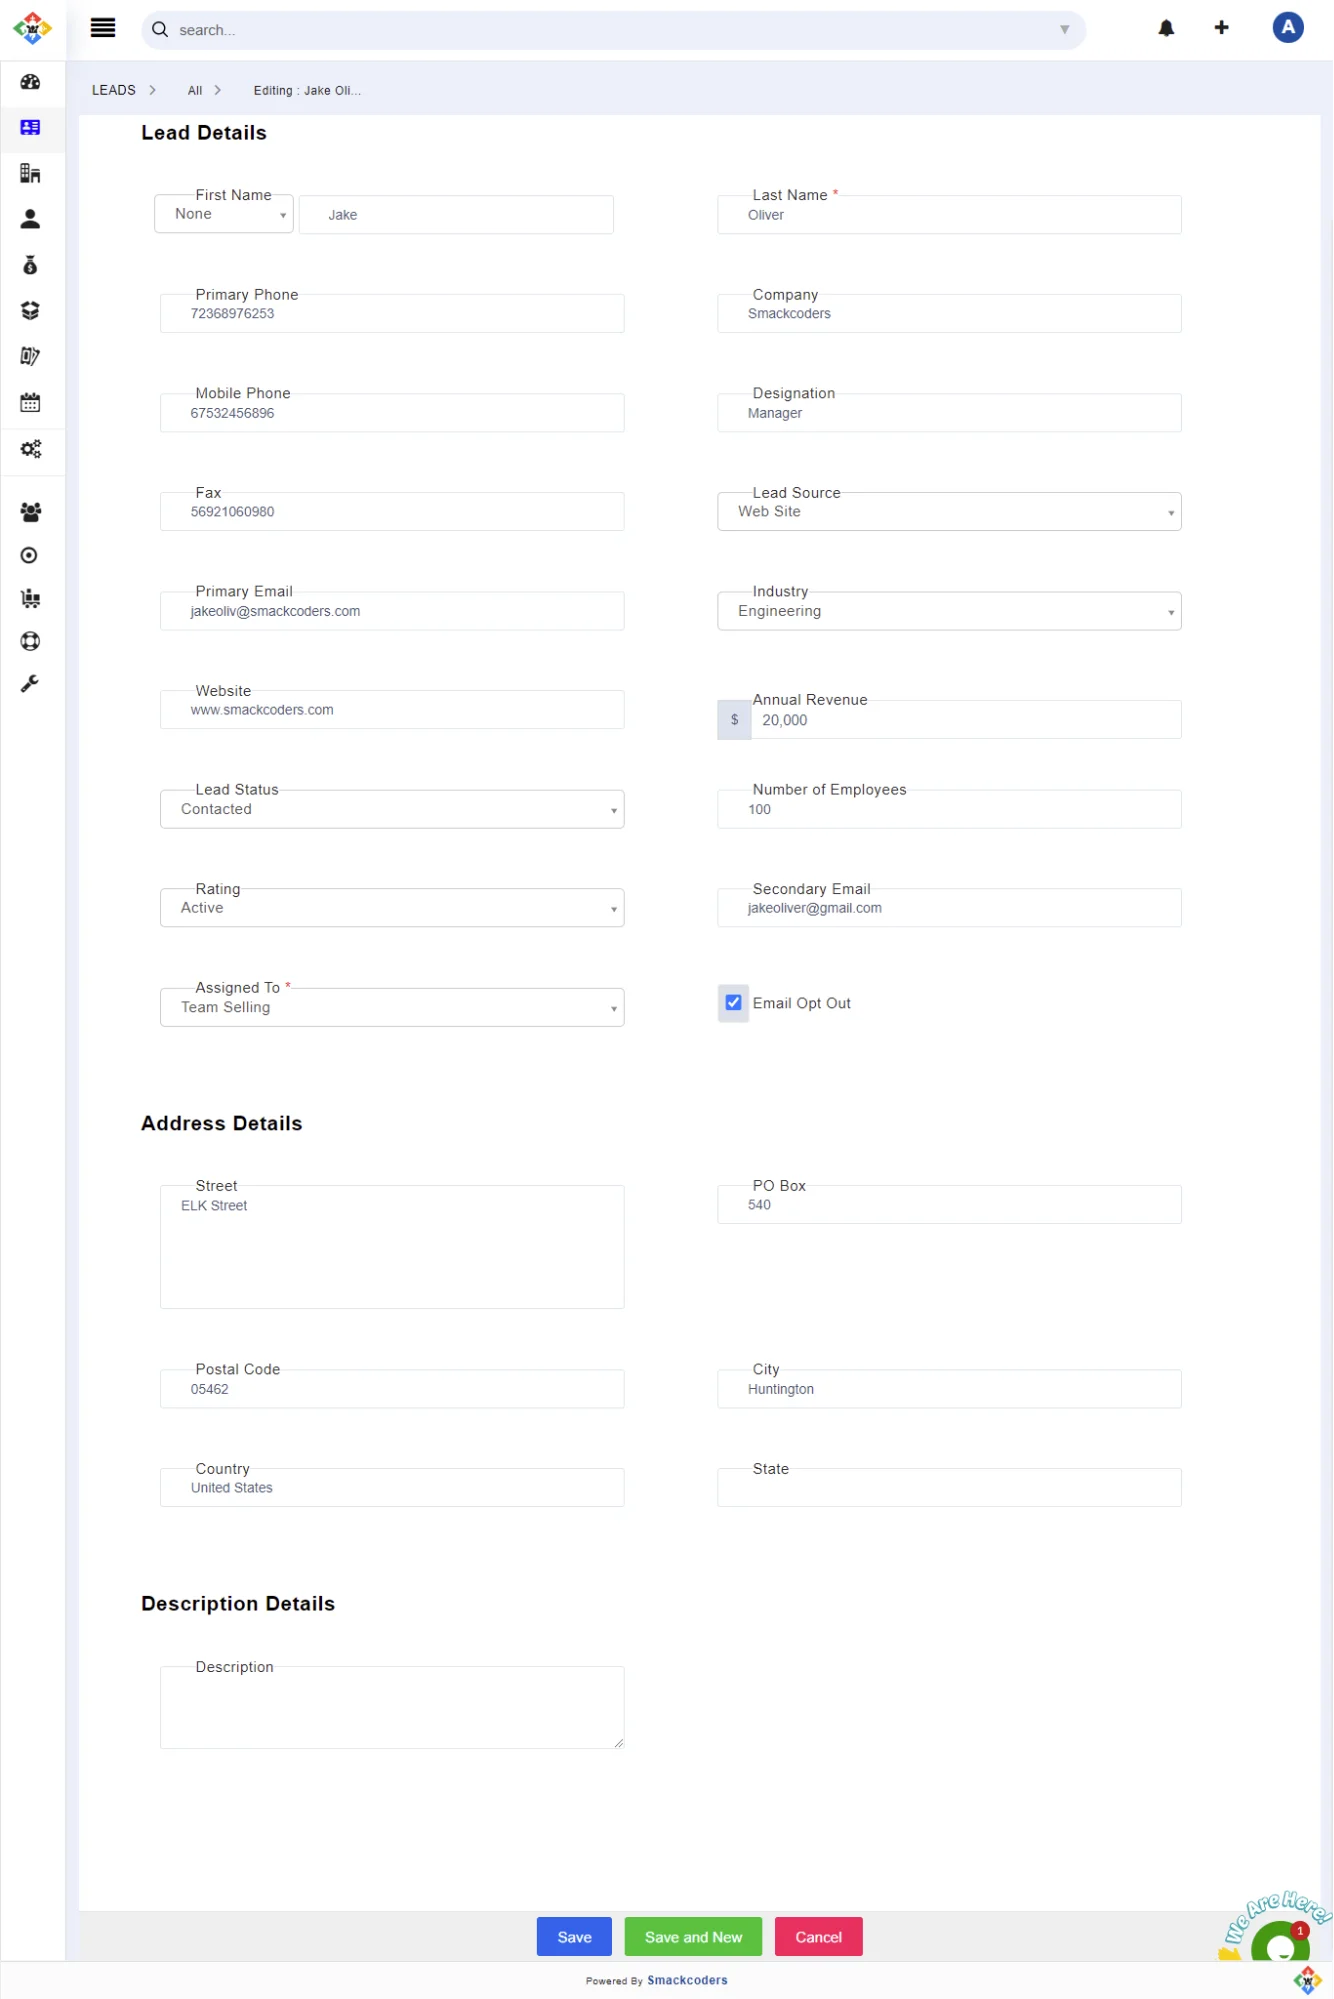
By default, Joforce CRM offers you a list of fields to add information related to your customer. The below image gives a list of the default fields in Joforce CRM.
However, you can also add custom fields to know more about your prospects.
Converting a qualified Lead into a Contact #
Once your Leads are qualified, you can easily convert them into Contacts and add the organization’s info. To do so,
- Go to the detail view of the lead and click on Convert Lead in the top menu.
- In the Convert Lead pop, the lead data is copied to the corresponding contact and organization data(if you properly added the Lead data).
- You can also change the information as per your needs
- Finally, click Save
Once you hit save, new records are created in Contacts and Organization and remove records from Leads. The data creation and the information transfer from Lead to Contact or Organization or Deals are done based on Mapping.
Managing Lead records #
Common action performed
- Click on a List text box at the top → click on Add Filter option beside the LISTS to create custom filters.
- Click on Import → To import all your existing information into Joforce CRM
- Click on More → take the necessary actions
- Fields & Layout → To configure the module fields and customize the field layouts. Module Layouts & Fields
- Workflows → To add workflows related to your Task and Events.
- Picklists Values → To modify the picklist values
- Numbering → To create custom numbering for records
- Setup WebForms → To setup webform to automate the Lead capture
- Lead Conversion Data Mapping → Mapping to convert your qualified Lead to Contact or Organization or Deals
- Merge selected records → To merge the records
- Find Duplicates → To find duplicates in the module
- Export → To export the data to an external source
Action performed in the list view
- Click on the Search icon in the right corner → To search for records in that module
- Click on the Box icon in the right corner→ To alter the header menu
- Double-click on the menu → To sort the menu.
- Bulk Actions on multiple records → Select the desired records → click on the drop-down menu at the top
- Send Email → To send email to selected people
- Follow – To keep track of a record
- Unfollow – Disable when you no longer need to keep track of a Lead
- Add Tag → To add a different tag for the selected records
- Edit → To edit the selected records on the whole (Mass Edit)
- Delete→ To Delete the selected records(bulk deletion)
- Comment → To add comments to the selected record
Actions done on a single record
- Enable the STAR icon to follow(keep track of) a document. Disable it to unfollow.
- Click on the drop-down in the right corner of each record
- Details → Navigate to the detailed view of the record
- Edit → To edit the record
- Delete → To delete the selected record
- Click on the Eye icon in the right corner of each record → To get a quick view of your record info without navigating to the detail view
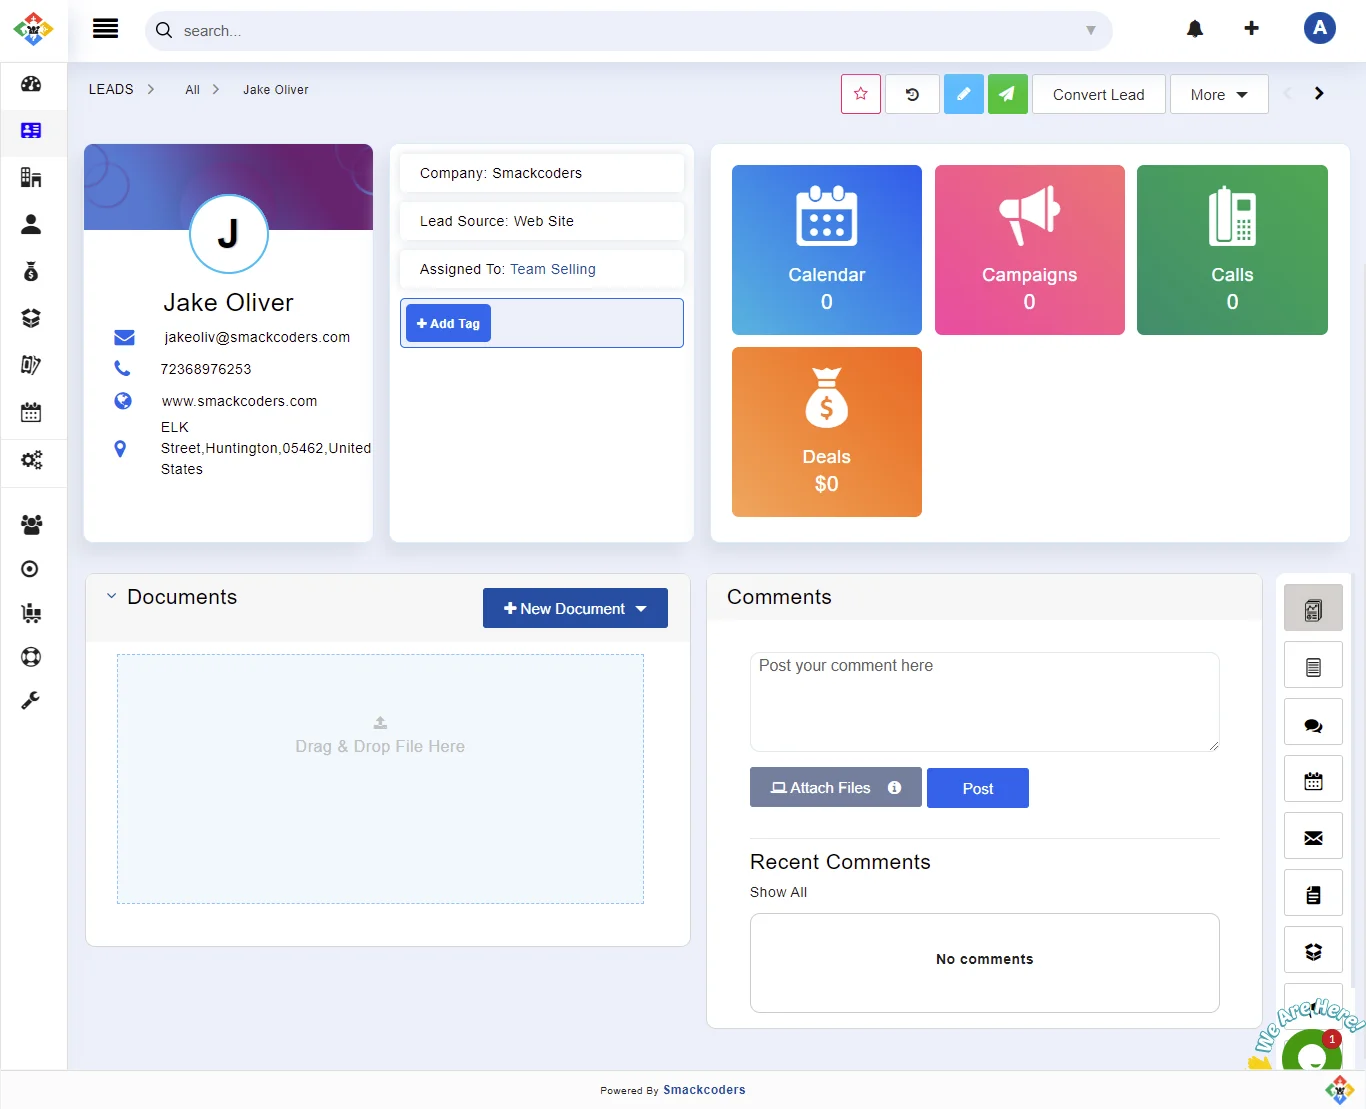
Action performed in the detail view
- Click on Add Tag below the Lead icon→ To add a tag
- Click on Follow – To keep track of a Lead
- Click on Edit → To edit the record
- Click on Send Email → To send an email to your prospects
- Click on Convert Lead → To convert your qualified lead into contact or organization
- Click on More → choose the necessary action
View/ addition other module records related to the particular Lead #
You can easily view/ add the other module records related to a specific Lead.
- Go to the detailed view of the particular record
- Click on the appropriate module icon. It displays all the related records.
- You can also relate a new record either
- By selecting from the already existing records
- By adding a new record to that module
The list of modules included are
- Activities, Email, Documents, Products, Campaigns, Services, and PBX Manager


