Users are the employees of your organization, who are able to log in, access, and perform the relevant task in Joforce. You can add as many users as possible.
Adding New User #
First, log in to the Joforce CRM as an admin. Now the Joforce home page will be displayed. As an admin user, you can easily add new users to your Joforce. To add a New User,
- On the home page Click on SideBar in the top left corner
- Click on Settings and navigate to the User Management section
- Select Users and then click Add User
- By default, the list of active users is listed here.
- Add the following field values. Joforce lets you add various information about your user. All the info is categorized here
- Basic Login info
- Username – The name of the user (Mandatory field)
- Primary Email – The user’s email. Use a unique email address that hasn’t been used before. (Mandatory field)
- First Name – The first name of your user
- Last Name – Your user’s last name (Mandatory field)
- Password – Provide the appropriate User Login Password i.e. is used by your users to log in to the Joforce account
- Confirm Password – Re-enter the password that is used earlier.
- Admin – Check on the admin, to provide your User the admin access(Complete access to Joforce)
- Role – Choose the appropriate role of your user. Based on the role, the users have restrictions in accessing the information in the Joforce Account.
- Default Lead View – Choose the default lead view for your user.
These are some of the fields to create a new User. You can also add other information like
- Formatting numeric values. It includes:
Currency Info – Add the currency-related information
Digit grouping pattern, Digit grouping separator, symbol placement, decimal separator
- More Information – Lets you add more info related to your user including Email, phone, user signature, user language, CRM phone extension, Default landing page,
- User Address Info – Communication information
- User Image – Add an image of your user
- Once done, hit Save.
- Share the credentials to the appropriate user and then they can access their own Joforce Account.
Making changes to the user information #
Change of information of other users – As an admin user, you can easily edit your own and other employees’ account information at any time.
- To edit the user info, click on the Left SideBar→ Settings → Navigate to the User Management section → Users → Click on the appropriate user → Edit button on the upper right corner.
- Make the necessary changes, and hit Save.
Change of information of their own – Admin and users can easily change their own details,
- Click on the Profile icon → My Account→ Edit
- Change the necessary information and click Save.
- Or Click on the Profile icon → Edit My Account
Changing the user credentials #
Change credentials for other users – Admin users can easily change the User Login Name, Password, and Access Key of all the other users.
- Click on the appropriate user and click on More and choose the option whether to change the password or access the key. You can also view the user activity here
- To view the User activity click on More and then User Activity→ It leads to a page that provides the user activity with various options. You can find all user activity by selecting ALL. And also you can sort it by Today, Yesterday and By date.
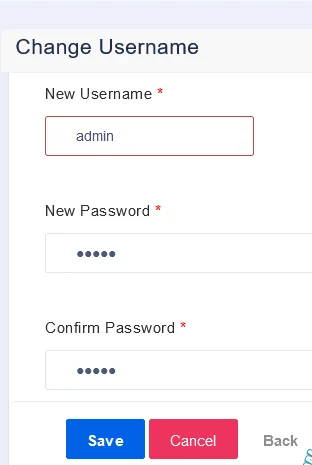
To change password → In the change password overlay, enter the new password and confirm the new password and then click on Save.
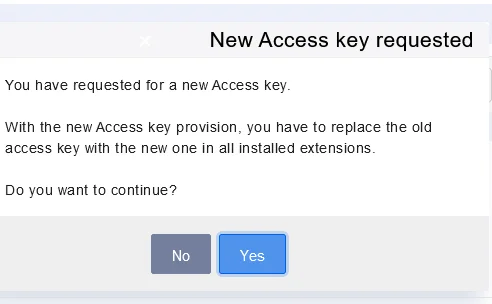
To change the Access Key → Click on the Yes on the New Access key requested overlay. Once done, your access will be changed.
- This can also be done for the list view of the users, click on the icon → Choose the appropriate option and then make the changes.
Change their own credentials – Both the admin and user can change the password and Access key on their own.
- Click on the Profile icon → My Account→ More → Choose the option (Change Password or Change Access Key)
- Make the necessary changes and click Save.
Deleting a user
Admin users can delete any Joforce user at any time. To do so,
- Click on the appropriate user → More → Delete → in the deleted overlay → click on Yes
- After which, Transfer records of user window prompts, from here you can easily transfer all the information related to this user to another user.
- Transfer records to the user – Choose the desired user from drop-down ,to whom you want to transfer all the information.
- Delete User Permanently – Check on this to delete the user permanently, else the user will be marked as inactive and no longer access the account, you can use it for future reference.
- You can check all your Inactive Users using the InActive User at the top. From here you can easily Restore or Delete the User. Click on the icon in the list view → Yes
- Restore User – All the information is restored back
- Delete – The User will be deleted permanently, and can’t be restored back.


