After you install the module, you find it under Extensions in Joforce CRM Settings.
- Select the SecurityMaster module.
- In the ‘Login Settings’ section, click the Configure Login Settings button to start making changes.
- Tick the ‘Active Status’ checkbox to activate the Brute Force function.
- Block user after number of login attempts– Here specify, after how many logins the user will be blocked.
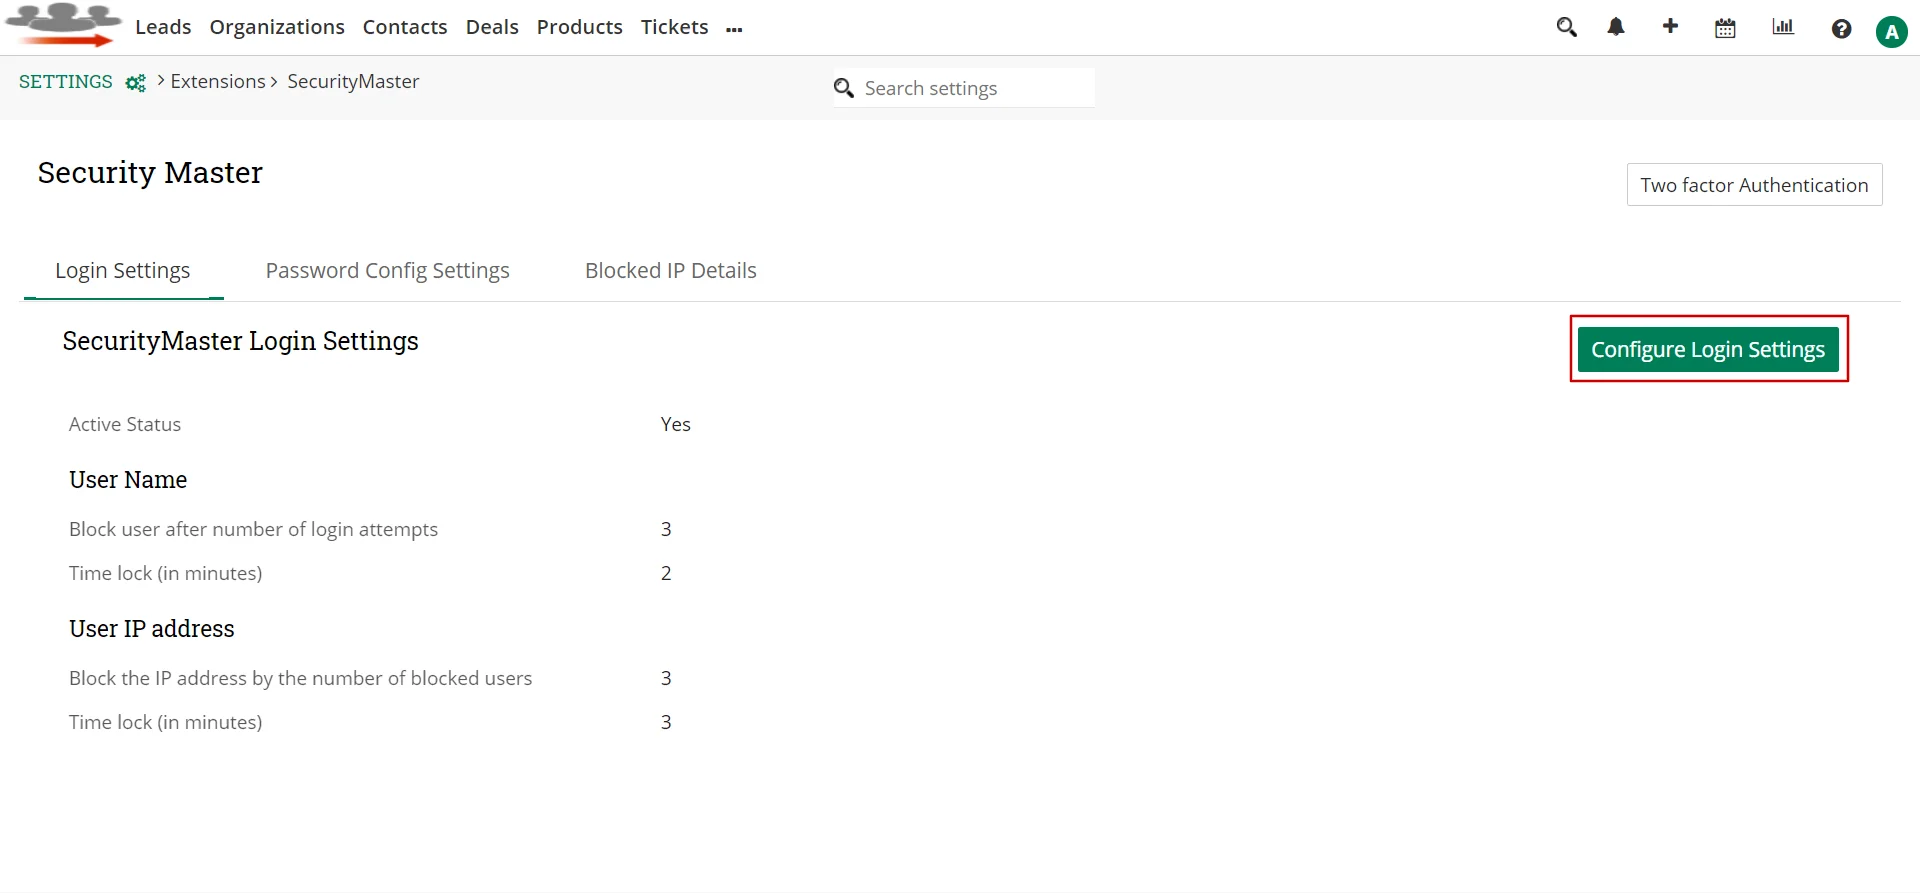
- Time lock (in minutes)– for how long the user will be blocked in minutes.
- Block the IP address by the number of blocked users– mention after how many locked users, the IP address will be blocked.
- Time lock (in minutes)– for how long the IP will be blocked in minutes.
- Click on Save.
Blocked IP Details #
You can view the list of blocked IP addresses inside Blocked IP Details. It shows details like User IP address, Date, Users name, Number of attempts and Actions. You can delete the details by selecting the Delete icon under Actions.

Setup Password Config Settings #
Define password rules for users by configuring the below settings,
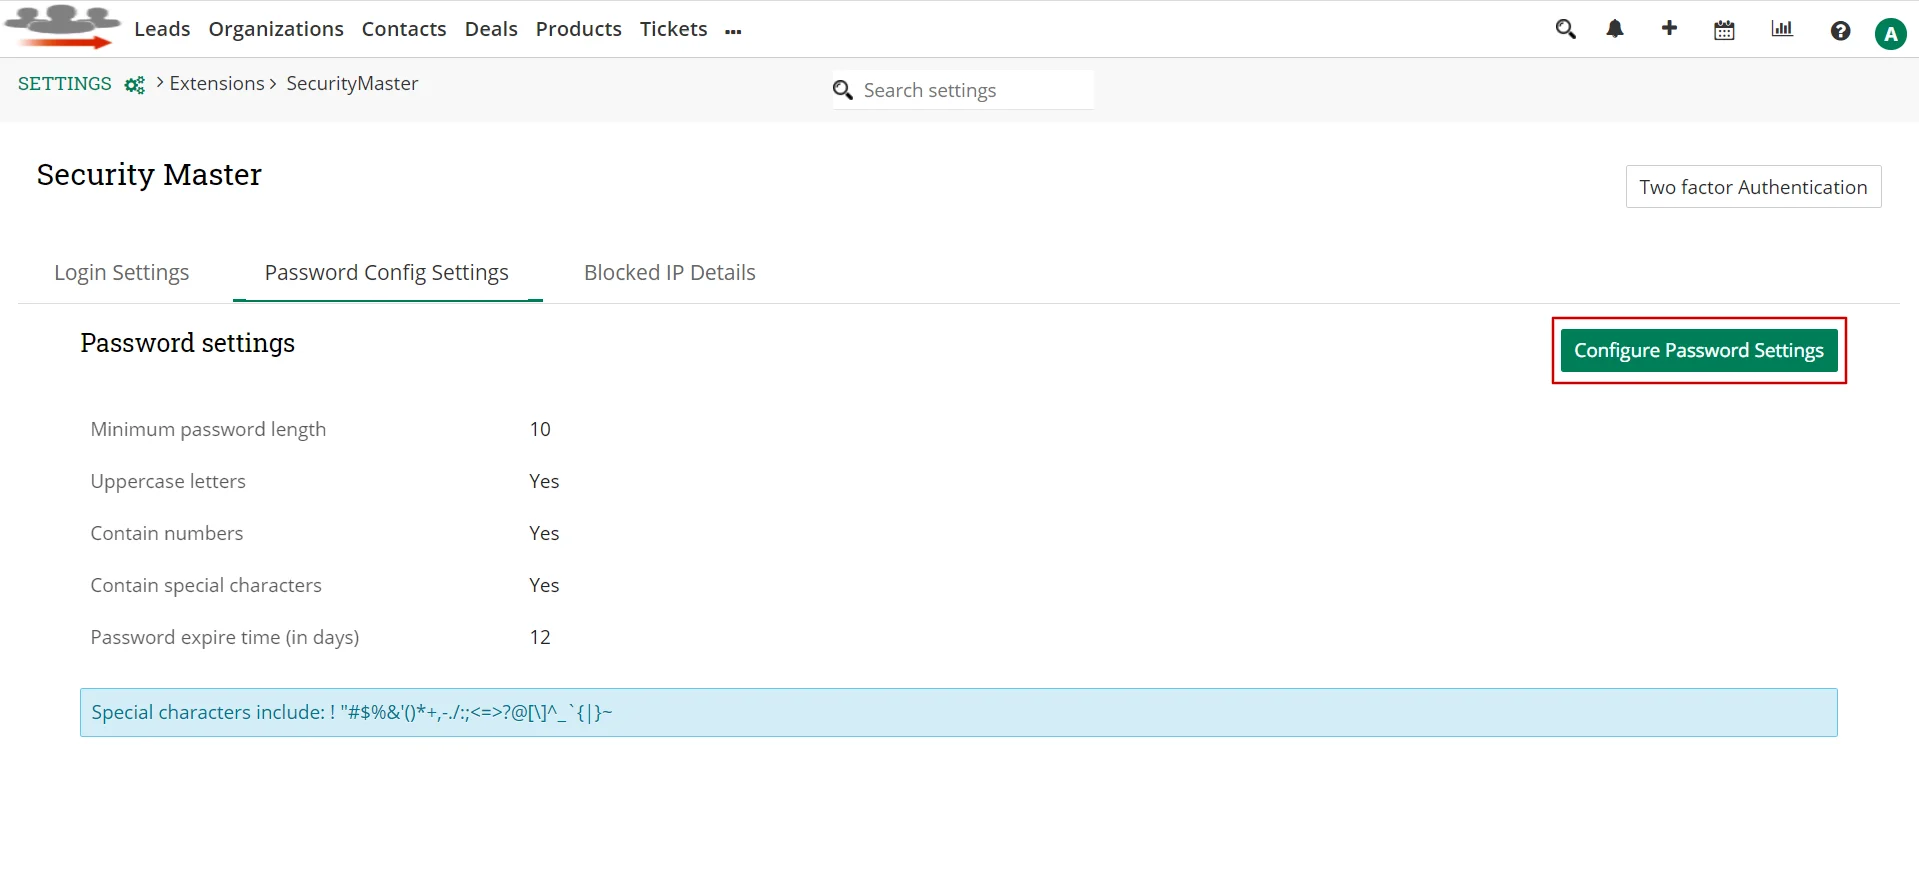
- Select Configure Password Settings.
- Minimum password length– mention the least number of characters for the password.
- Uppercase letters– enable if the password should contain an uppercase letter.
- Contain numbers– enable if the password should contain numbers.
- Contain special characters– Enable it if the password should contain special characters.
- Password expire time (in days) – set for how long the password is valid. If it exceeds the specified time limit, it’ll show a popup named “Change Expired Password” once you logged in, which prompts you to give a new password.
- Click Save.
When you create a new user inside Joforce CRM, it will show you an alert if the password you entered in the password fields does not match the conditions. You can change the password configuration anytime if you require.
Two Factor Authentication for Joforce #
Joforce admin users can enable or disable two factor authentication for each user. Once the admin sets up the configuration, the users are prompted to enter the verification code that has been sent to their email. The user can only be allowed to log in to the CRM if he gives the security code.
- Go to Settings → SecurityMaster.
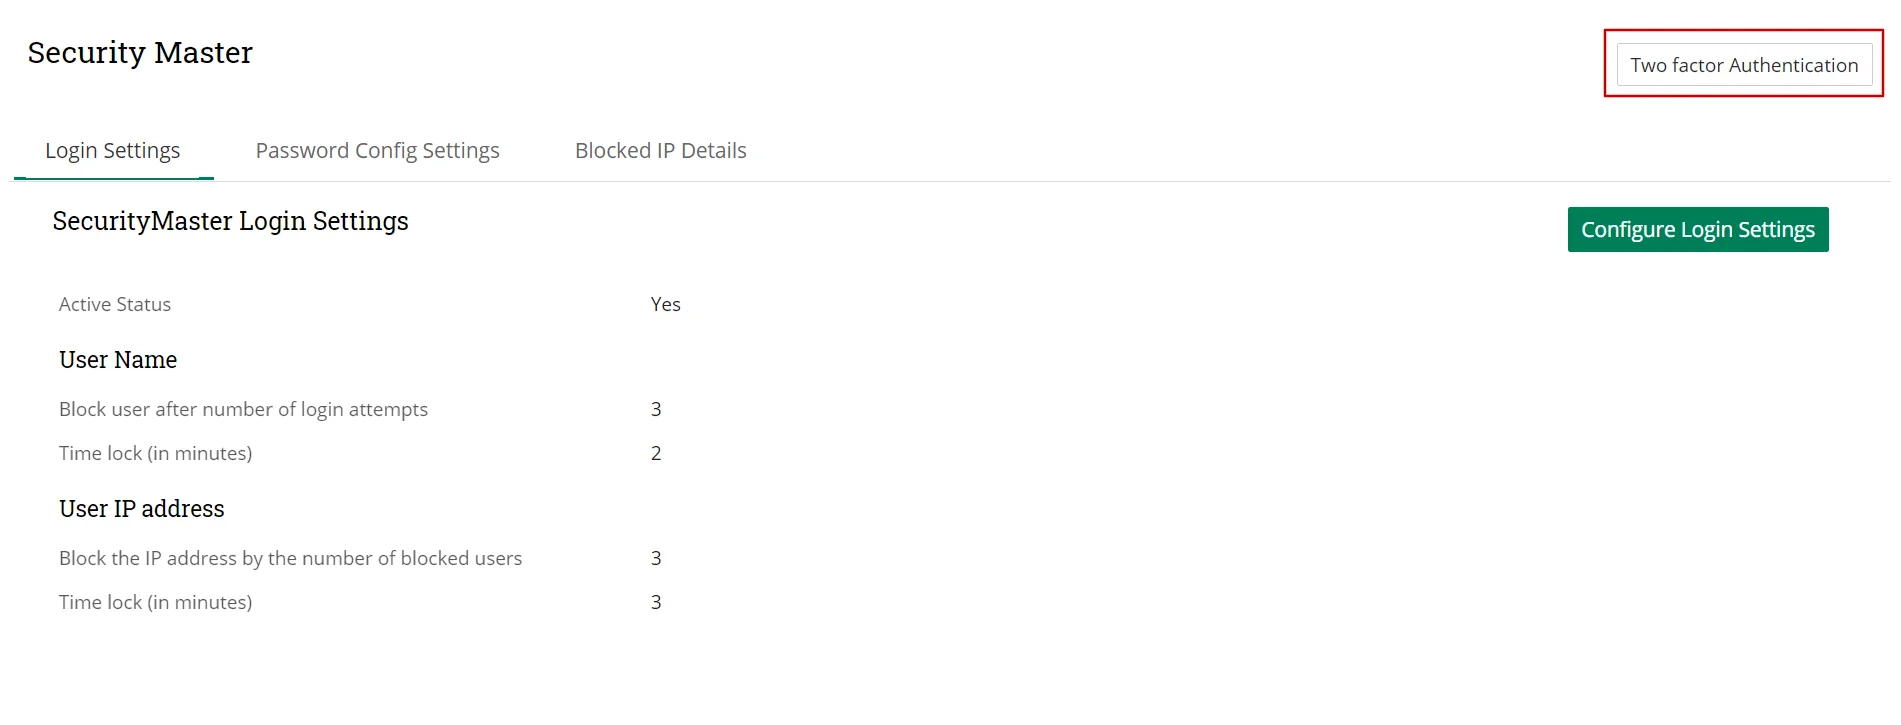
- Select Two factor Authentication button.
- It’ll direct to the configuration section, here you can enable or disable the module.
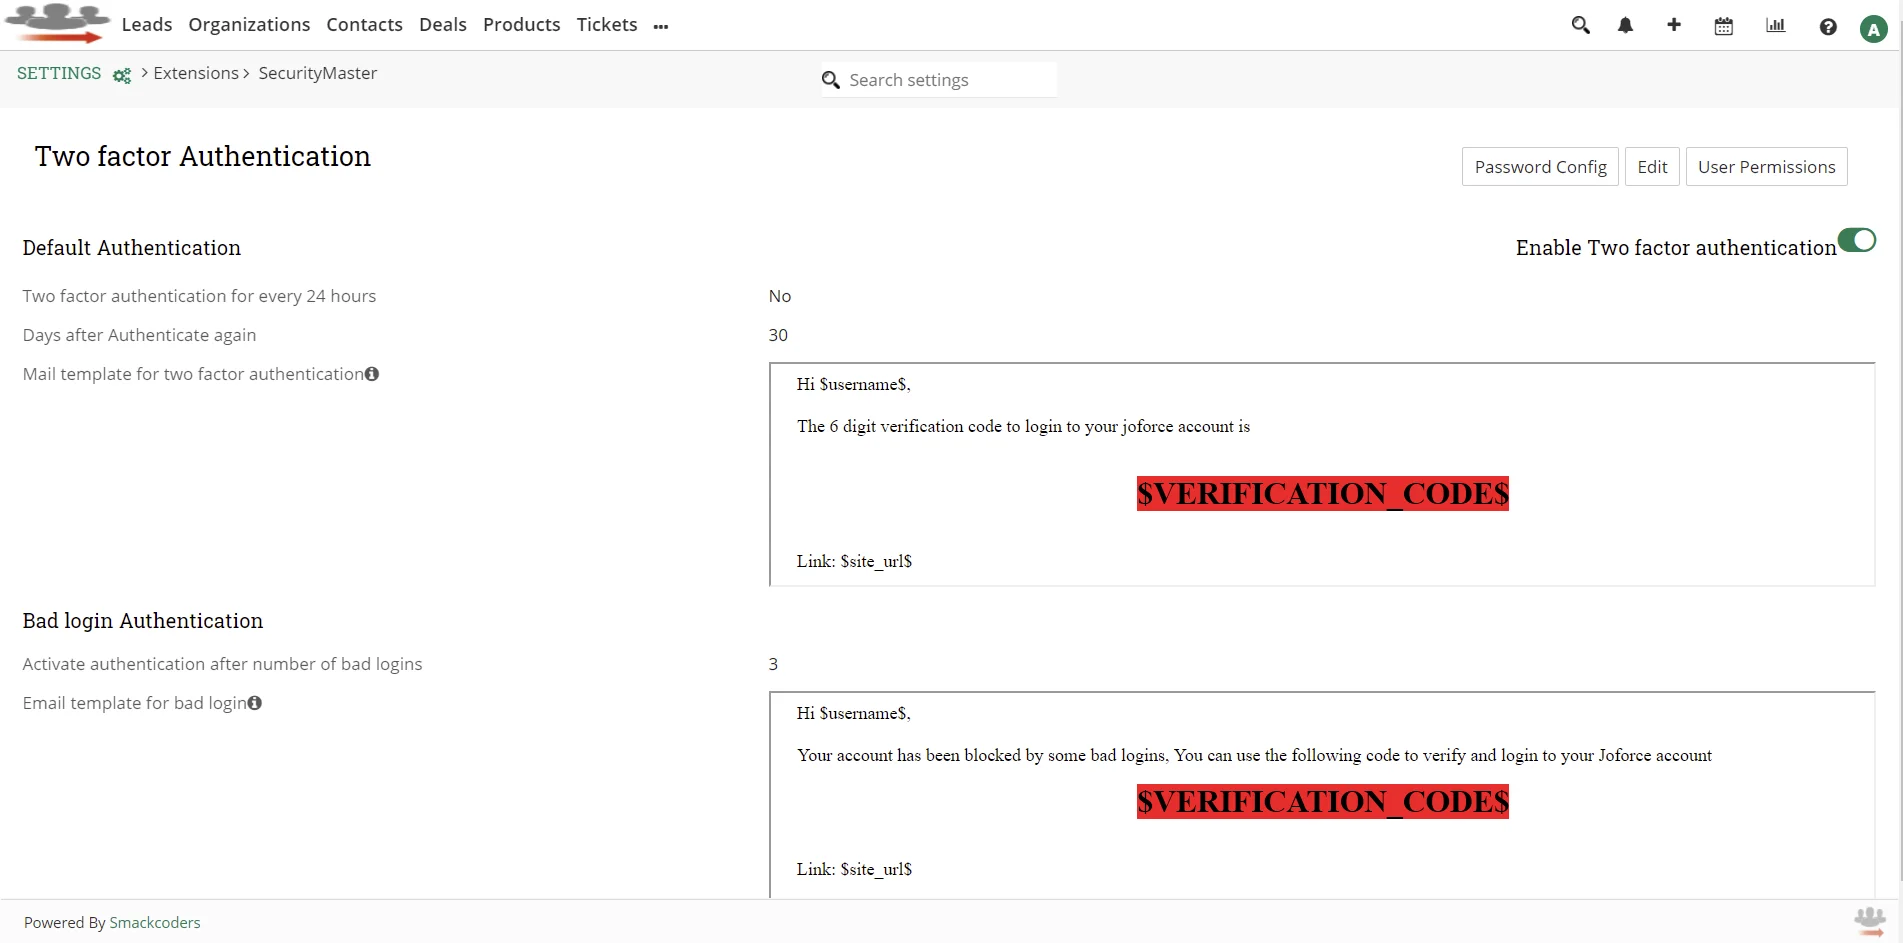
- To edit the configuration, choose the Edit button.
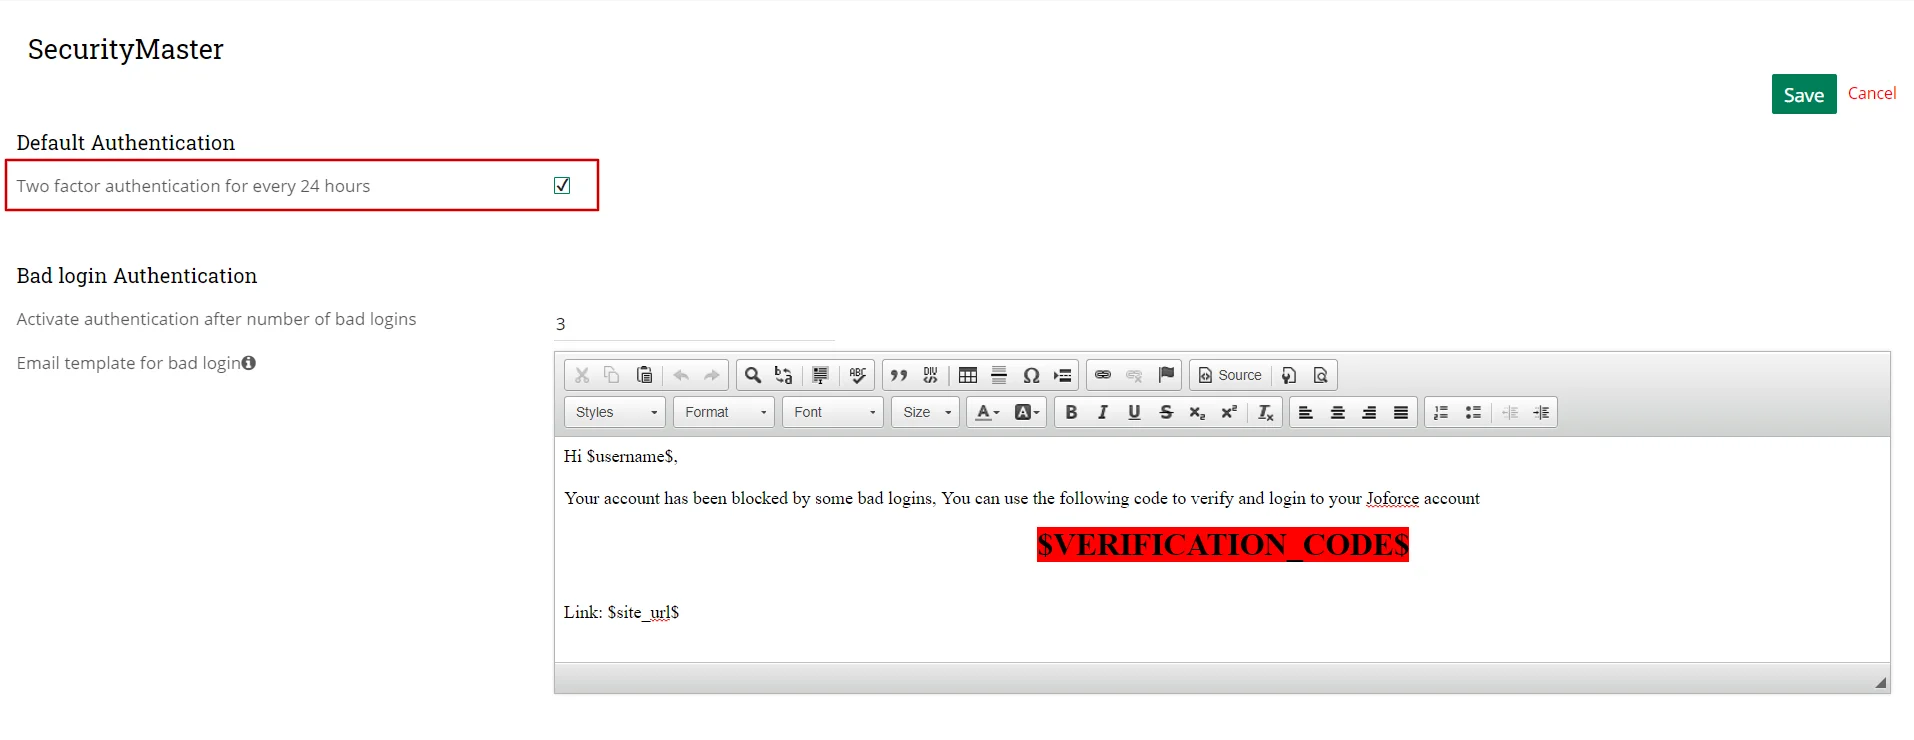
- Enable the Two factor authentication for every 24 hours to activate two factor for every 24 hours.
Days after Authenticate again – After the specified no.of days, it will prompt to verify with code. This feature can be usable if you don’t enable the Two factor authentication for every 24 hours.
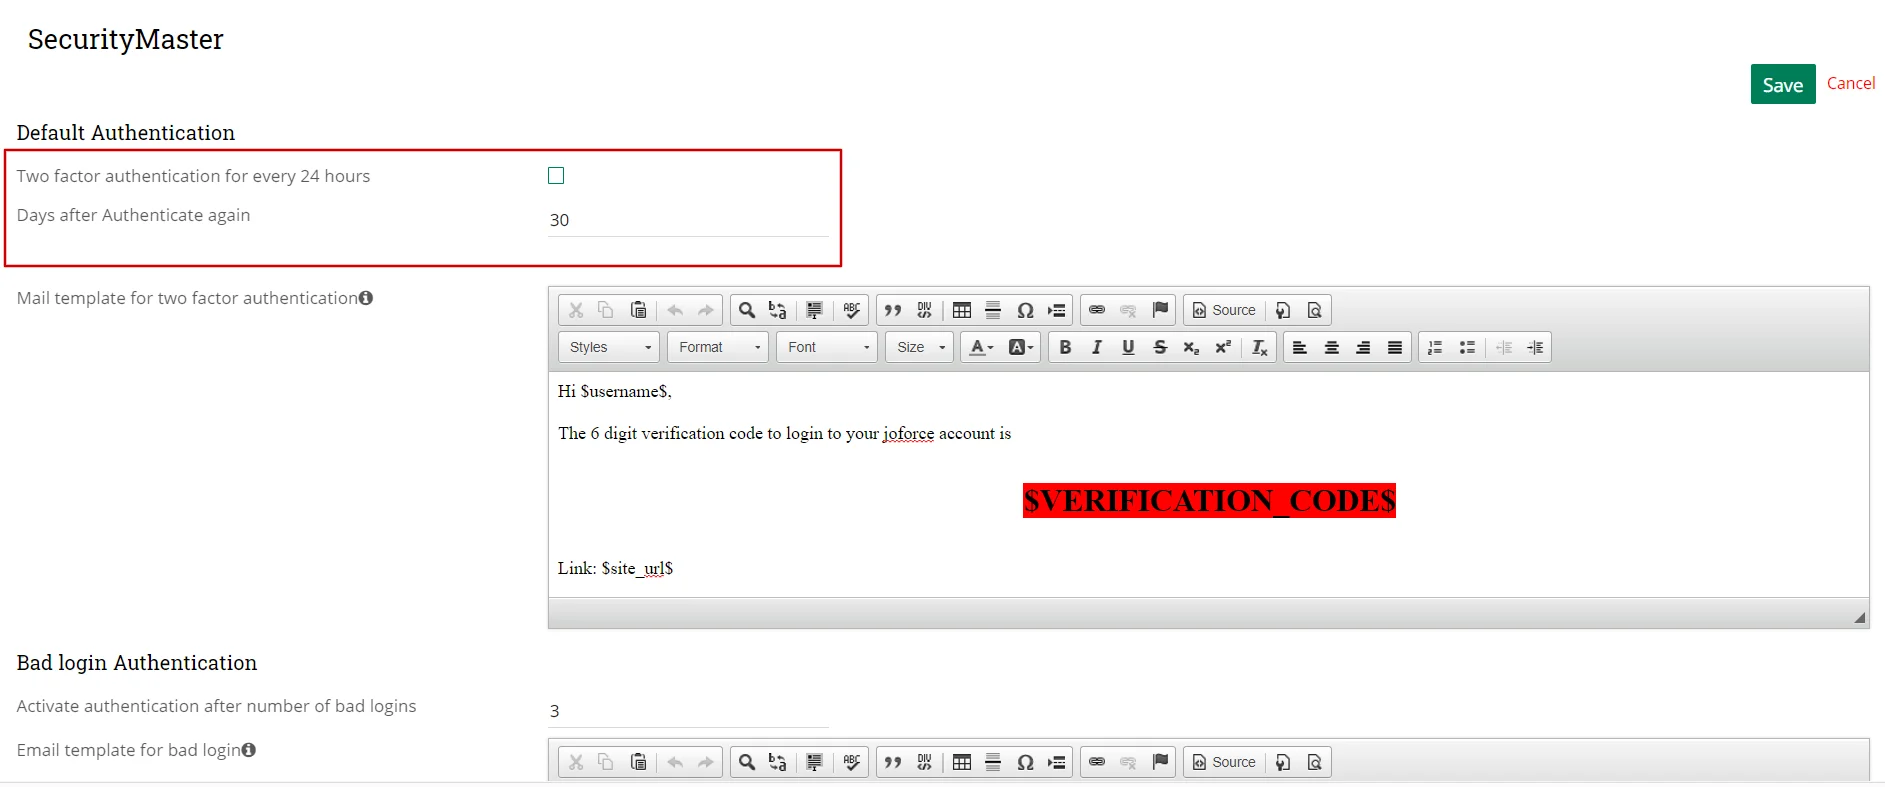
- Mail template for two factor authentication – email sent to the user with verification code. You can customize the email template according to your needs.
- Activate authentication after number of bad logins – Prompts the users to verify with code after the number of login attempts.
- Email template for bad login – Email sent to the user with verification code to log in to the CRM after no. of bad login attempts. The email template can be customized according to your needs. Once done, click Save.
Configure Two factor authentication for CRM users #
The security master extension lets you configure two-factor authentication for each Joforce CRM user.
- Go to Two factor authentication.
- Select User Permissions found in the upright corner.
- It lists all your CRM users.Check the Enable/Disable to enable or disable the two factor authentication for the corresponding CRM user. Only the admin user can configure these settings.
- It also shows details like when the user last login to the CRM, last verified, and no.of failed login attempts by the user.
- No.of.Failed.Attempts return value 0,if the user login with the correct verification code after no.of failed logins.

