You can create credit notes either from the Invoice module or create directly inside the Credit Notes module. For easy accessing the module, save it as a menu using our Menu Manager.
Create Credit Notes from Invoice #
- Go to Inventory → Invoice.
- Select one Invoice record to view in detail.
- In the record detail view, click on the Credit Note button to create a new credit note.
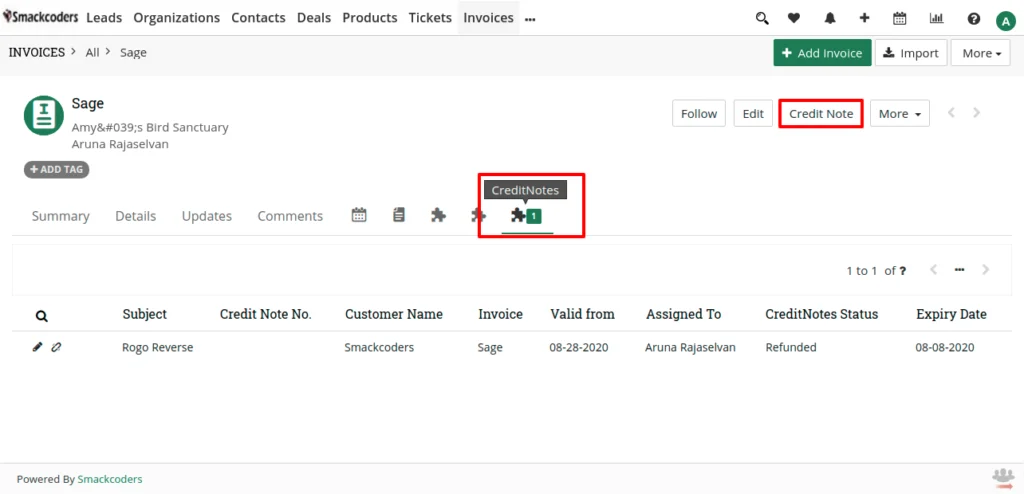
- Once you click, it’ll show the edit view for the Credit Notes record.
- Fill all the mandatory fields and save the record using Save .
- You can view all created records inside the Credit Notes module.
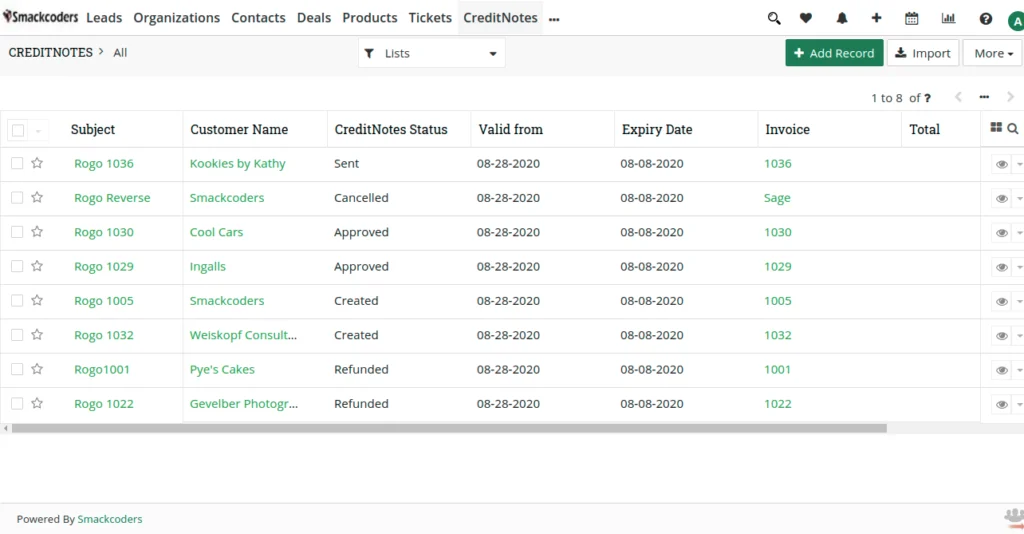
Create a Credit Note #
- Navigate to Credit Notes.
- Select Add Record to create a new credit note.
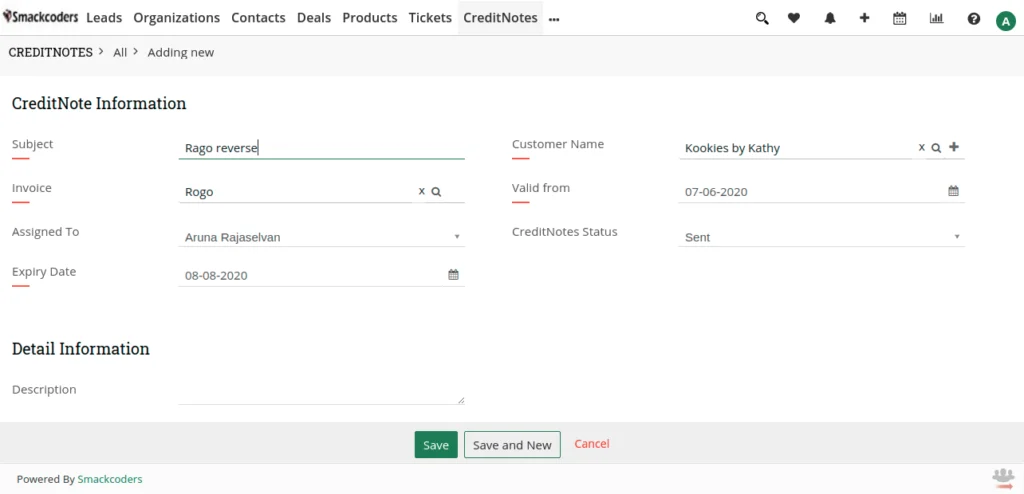
- Fill out all the fields you want.
- Save the record using the Save button.
Import Credit Notes in JoforceCRM #
The other way to add Credit Notes inside JoforceCRM is by importing them as CSV files. To import Credit Notes.
- Go to Credit Notes.
- Select Import on the top right corner.
- Upload your CSV file using ‘Select from My Computer’.
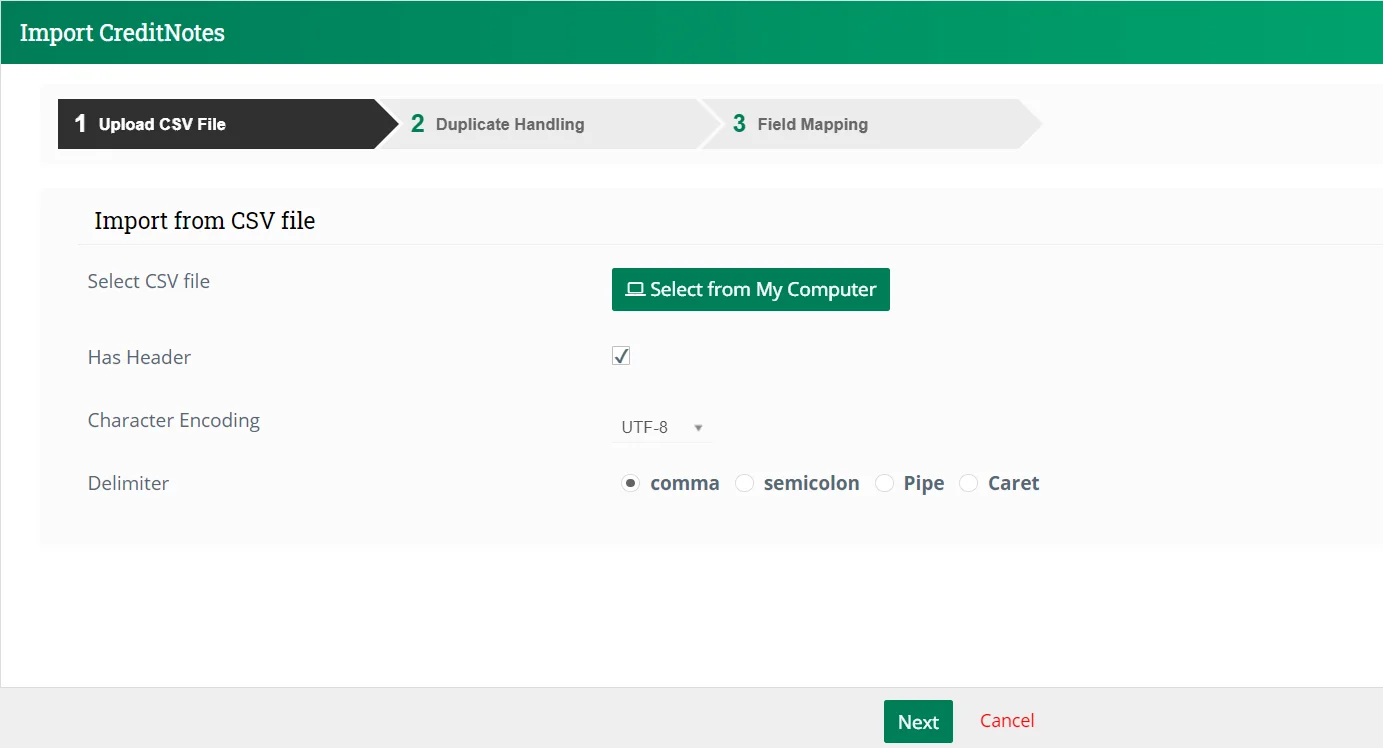
- Click Next.
- Skip the duplicate handling if you no longer need to check for duplicates.
- Choose the action to perform when duplicates are detected. You can either skip duplicate records, or overwrite the duplicates on existing records or merge duplicates with already existing records.
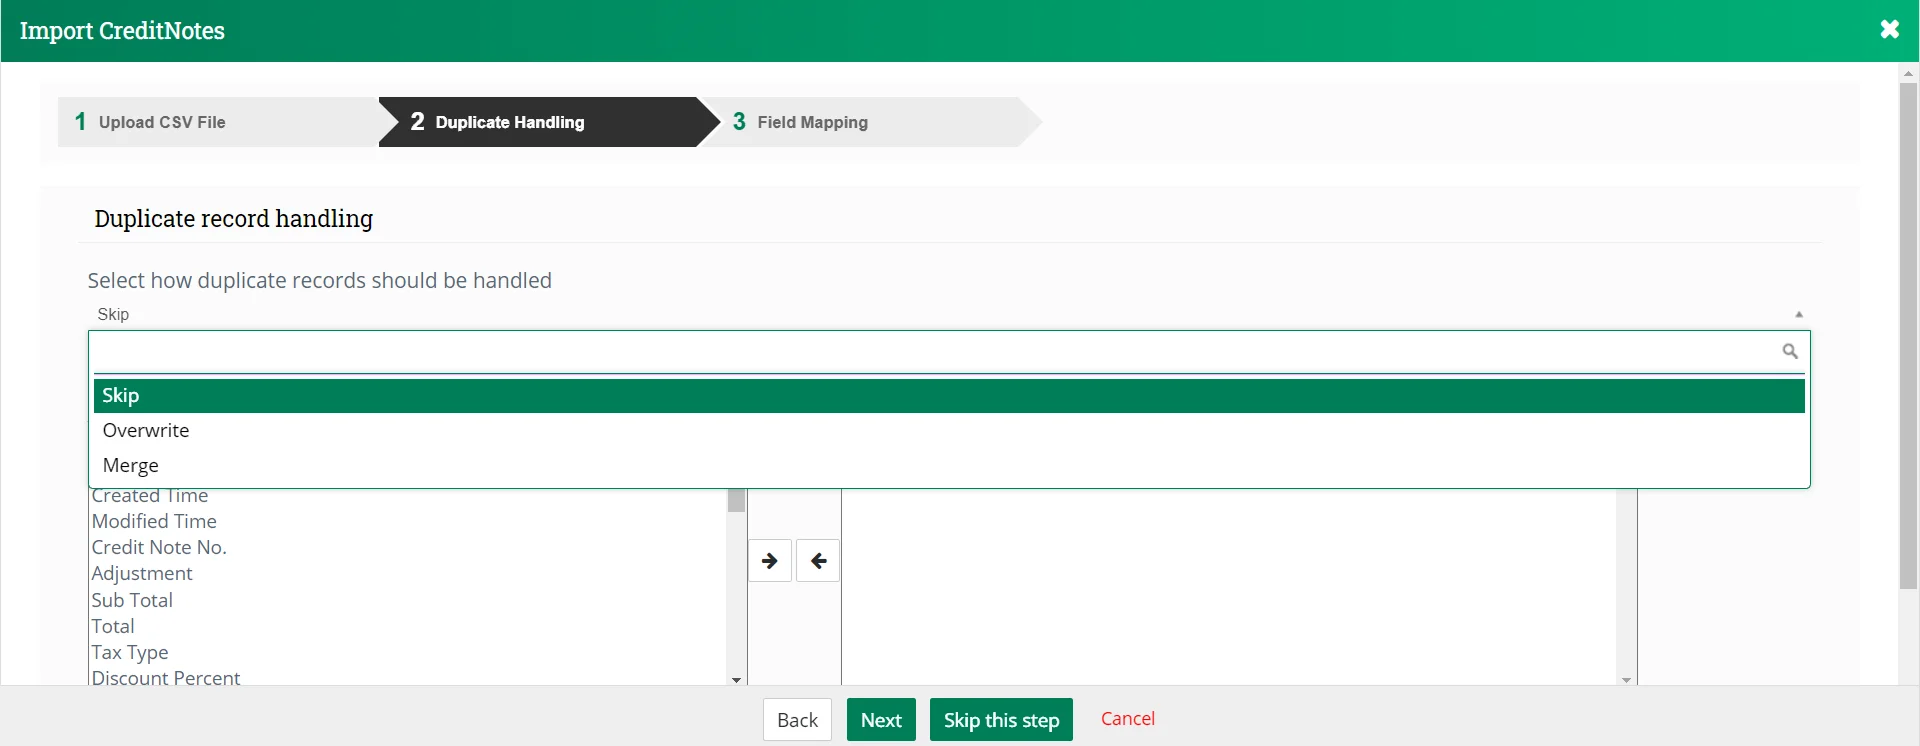
- Click on Next.
- Make sure that all the fields are correctly mapped in the Field Mapping section.

- You can save the mapping as a template by enabling the ‘Save as custom Mapping’ checkbox and provide a name to it.
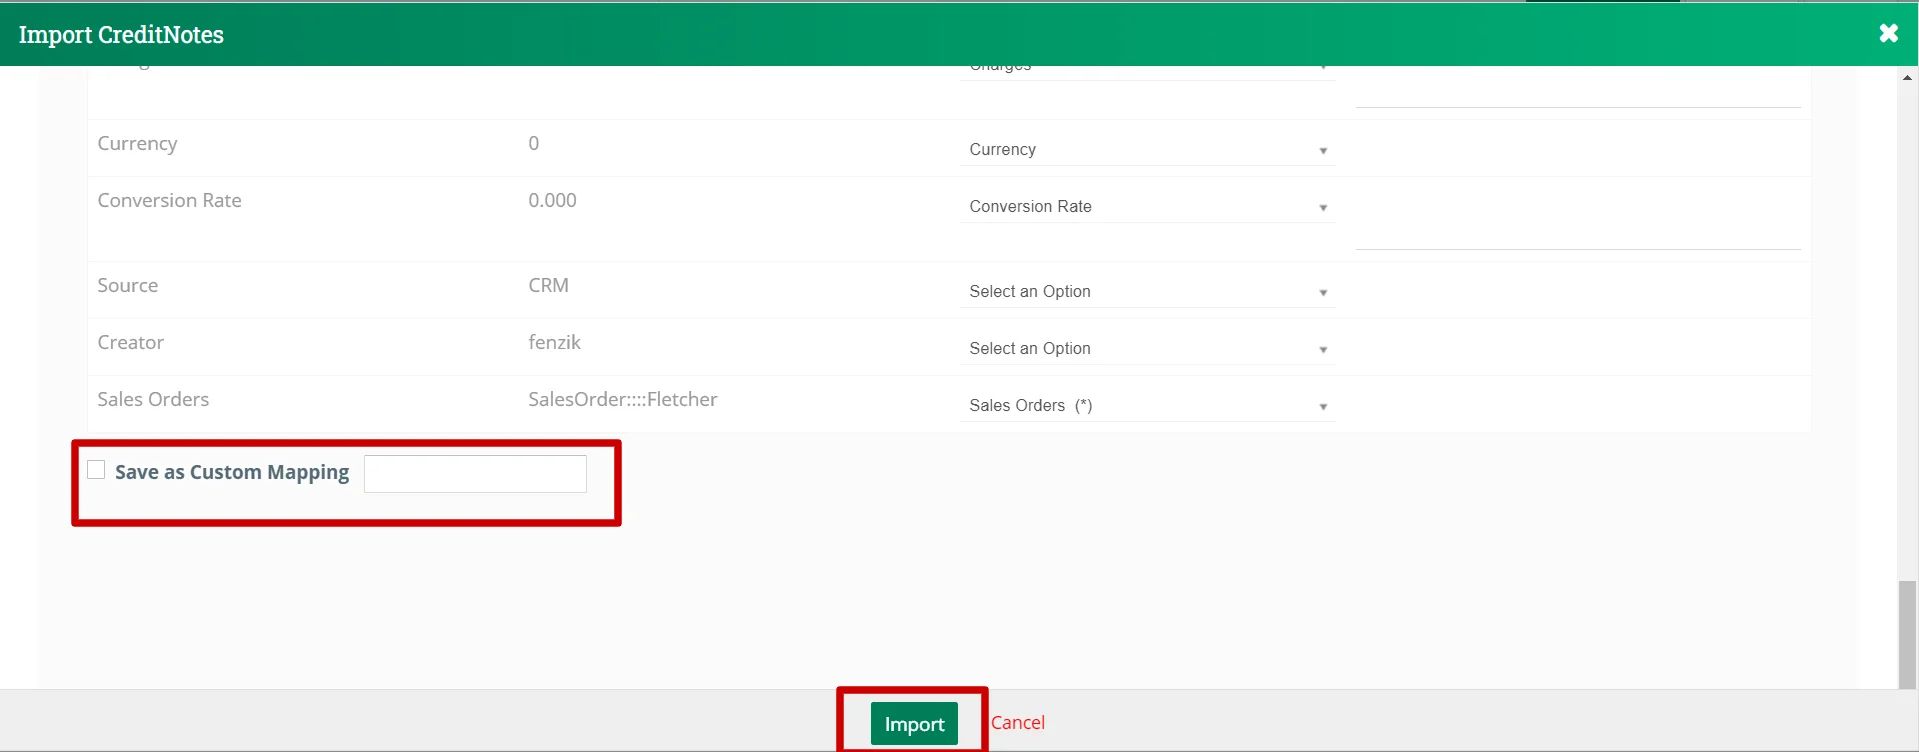
- Now click Import to start importing the data.
- When the Import is successfully completed, it shows results like No. of records successfully imported, No. of new records created, No. of records overwritten, No. of records skipped, and No. of records merged.
- From here, you can start a new import, or undo the last import.
