After you installed the module, you can find it under Extensions in JoforceCRM Settings.
Steps to Create Relation #
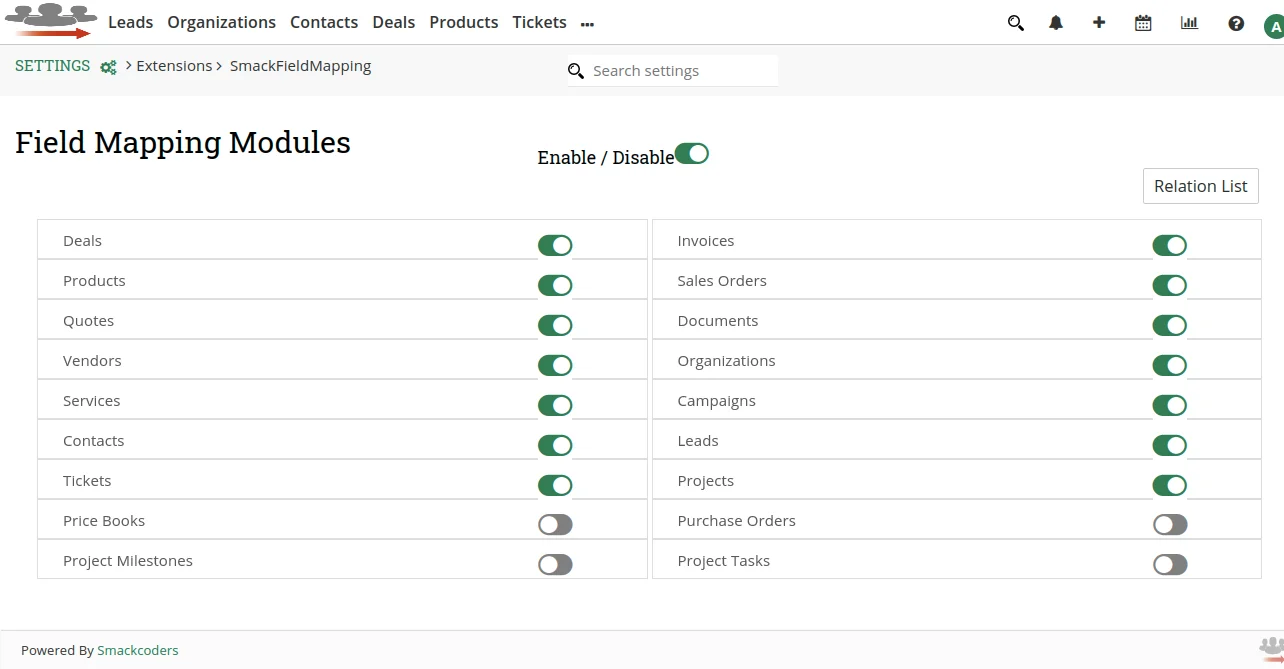
- Go to User Profile icon → Settings → SmackFieldMapping.
- Here you can enable or disable the module.
- Enable the module to make it active in JoforceCRM.
- You can also configure modules individually which you want to use for relation by enabling the modules.
- Select Relation List.

- It opens a new page ‘Field Mapping’. Here select Modules List, it heads back to the previous page where you configure enabling the modules.
- Select Create Relation to start creating a new relation.

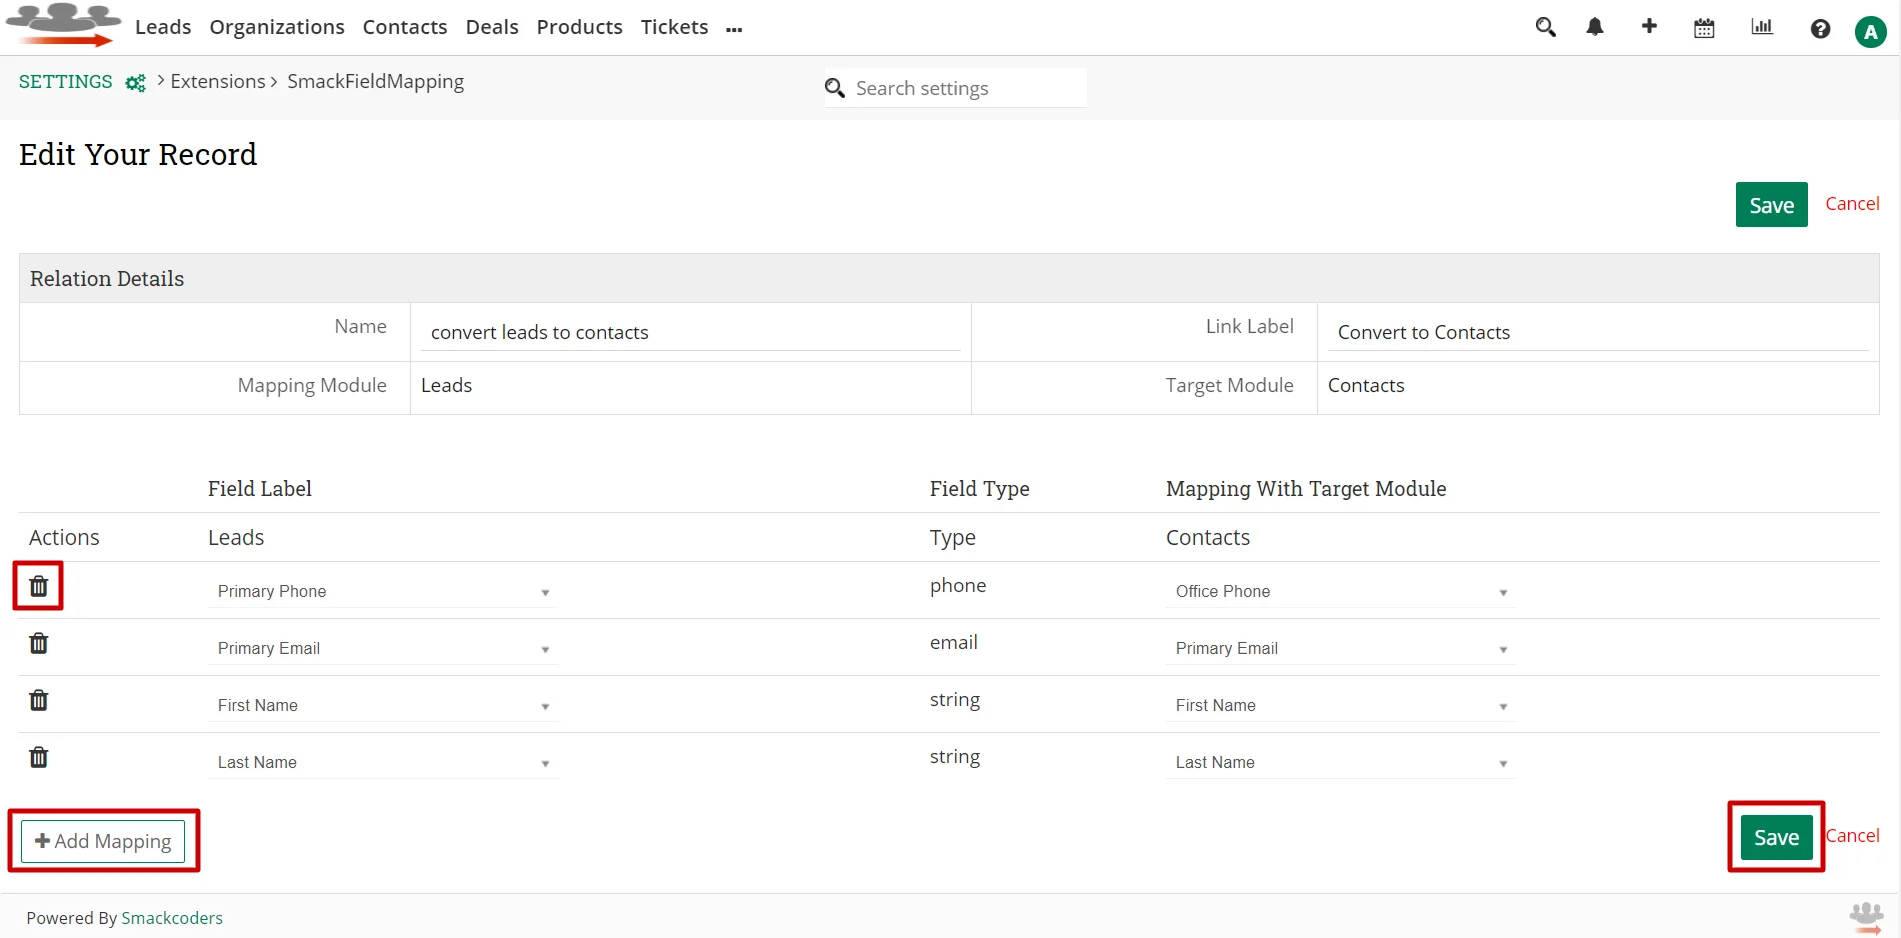
- It’ll open the ‘Field Mapping’ page, here add the following:
- Name – Provide name for the relation you are creating.
- Mapping Module – Choose one module from which you transfer data to another module.
- Target Module – Choose the module to which the data will be sent.
- Link Label – Provide label for the link which will be shown under More dropdown inside the ‘Mapping module’ record detail view.

- Once you finish, click the Save button.
- Next we have to add mappings.
- Add new mappings by selecting the ‘Add Mapping’ button.
- Select the field of the source module first, and then select the target module field.
- You can delete mapping using the delete icon on the left side of every field mapping.

- Click Save. The fields you mapped here will be pre-filled when you convert to the target module.
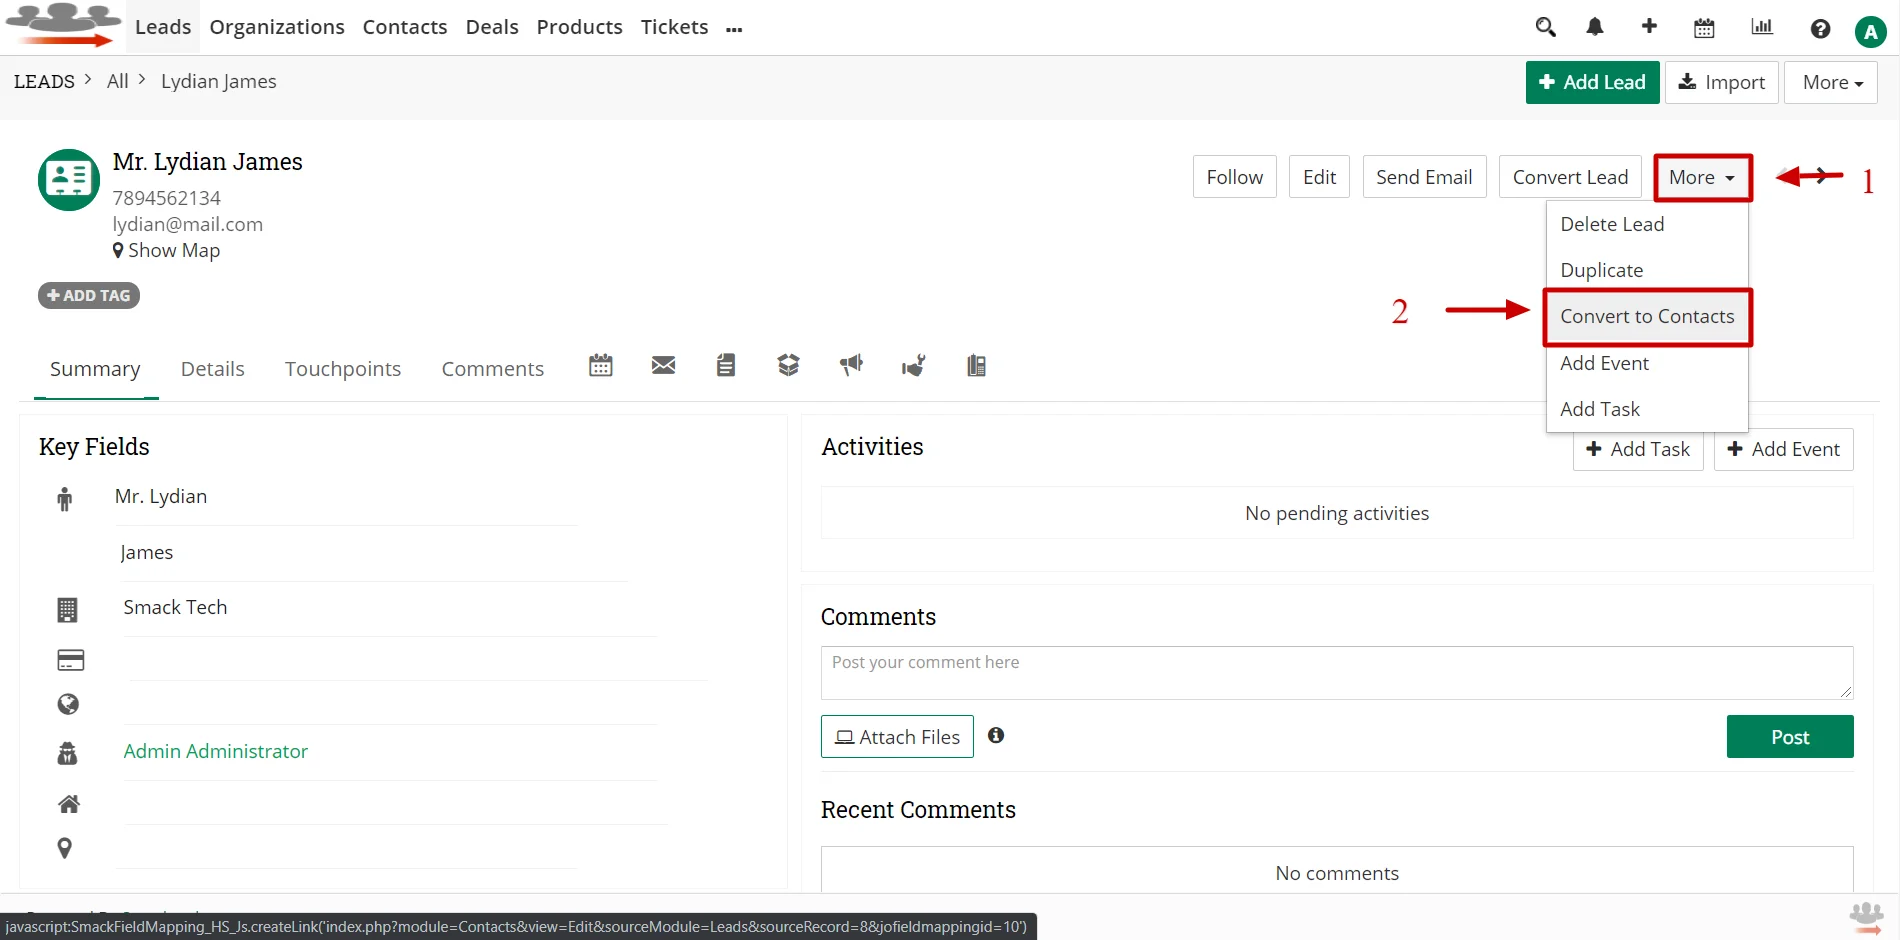
- Now go to the Leads module detail view. For example, here we have created a relation to convert Leads to Contacts.
- In the Lead record detail view, click More dropdown and select ‘Create to Contacts’.

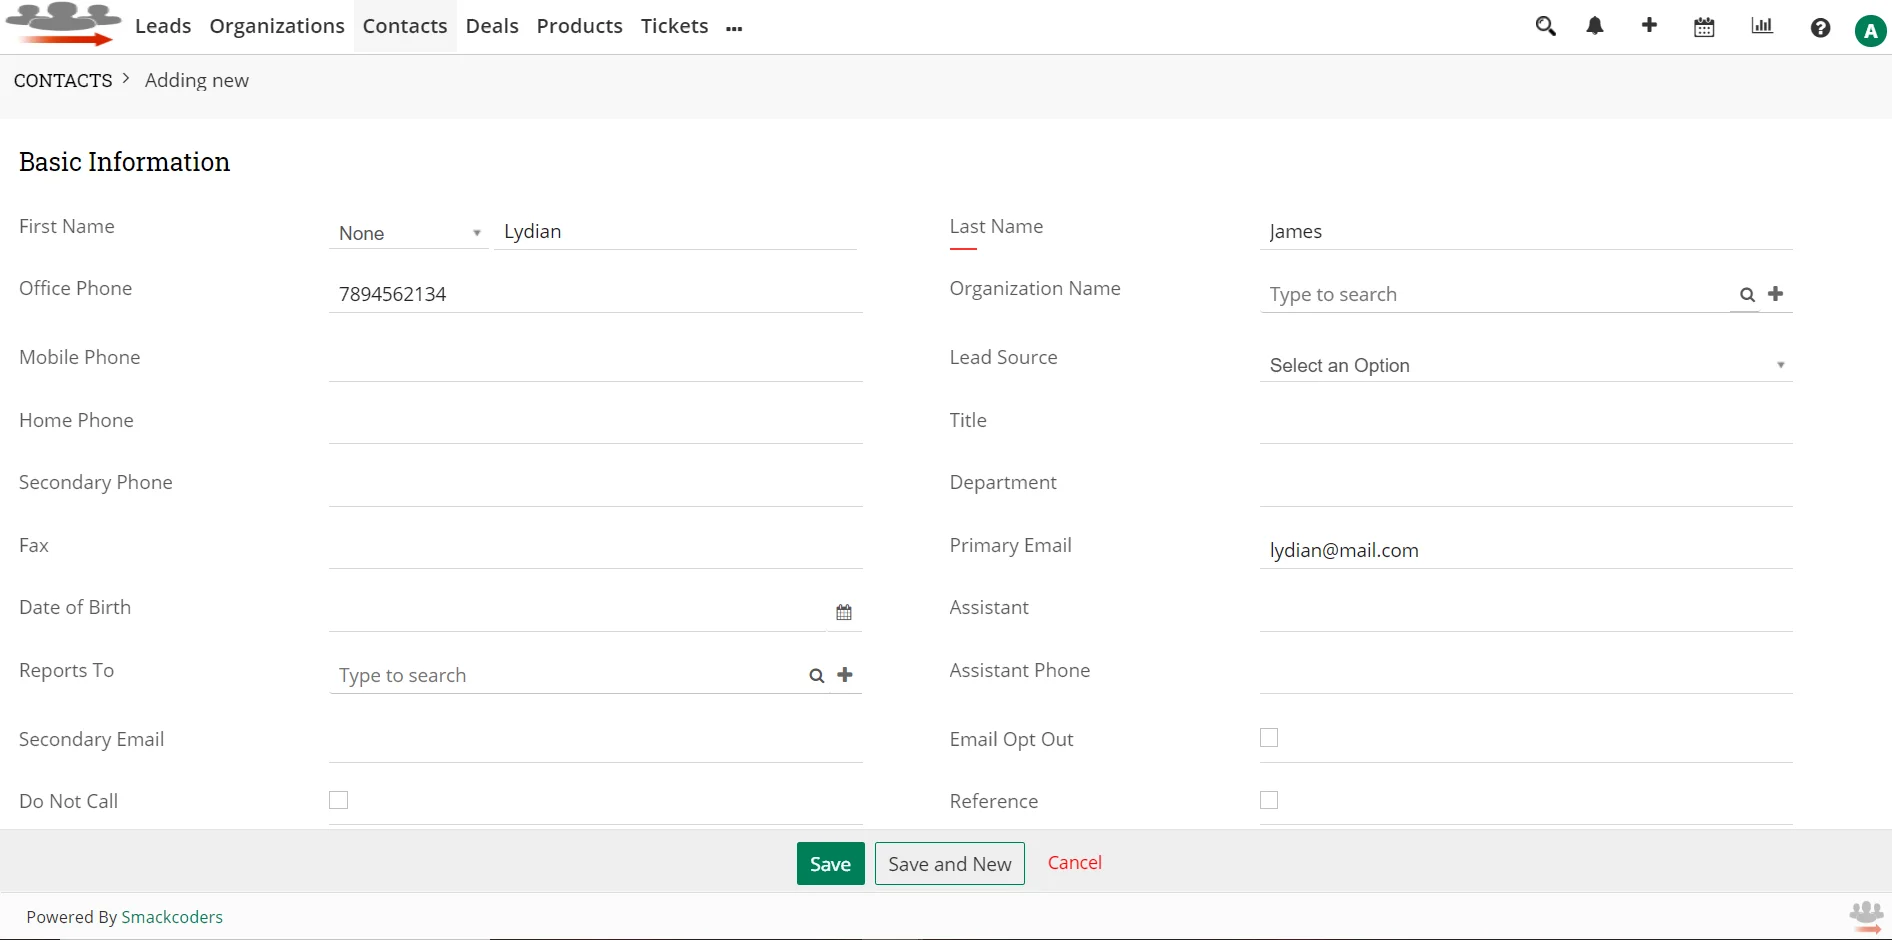
- It’ll redirect to the Contact Creation/Edit window.
- Here the fields we added to field mapping are filled automatically.

- You can fill other fields if you want.
- Click Save to save the contact.
