Search for a record in Joforce CRM #
You can search for any record information in Joforce CRM using the Search option in Quick Actions Bar. You can access it anywhere from Joforce CRM.
- Search on the whole – Displays all the records with the appropriate keyword from all the modules.
- Click on the search icon and type the desired keyword in the search box and hit Enter or hit the Search icon on the left.
Data export from Joforce CRM #
Joforce CRM lets you easily backup your CRM data in minutes. With the built-in Export option, you can get all your Joforce CRM data in a CSV file. To export data
- Click on the export option
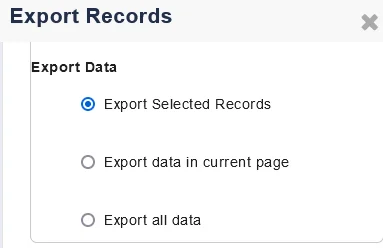
- In the Export Records overlay, you can view 3 different options. They are
- Export Selected Records – To export only specific records of the module
- Export data on the current page – To export all the records present on the current page
- Export all data – To export all the records in the current module
- Choose any one of the options, and click Export
Once you hit Export, all your record information is downloaded in a CSV format.
Find duplicates in Joforce CRM #
Joforce CRM enables you to maintain your CRM clean by allowing you to detect duplicates in Joforce CRM. However, you can detect & eliminate duplicates at the time of your data insertion either manually or by import. In case of disabling the duplicate check in the above 2 cases, you can use this to eliminate the pit fills of duplicates in Joforce CRM and keep your data clean.
- Click on Find Duplicates
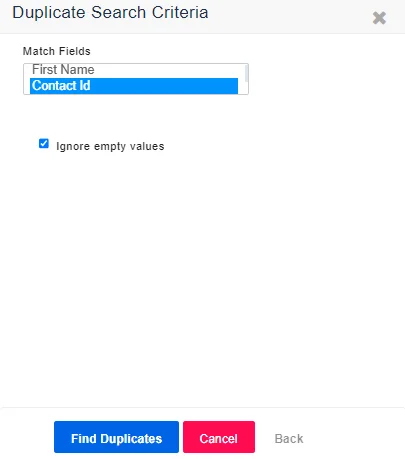
- In the Duplicate Search Criteria overlay
- Choose the fields in the Match Fields column, based on which the duplicates are detected
- Enable the checkbox to Ignore empty fields
- Now hit Find Duplicates
- It displays the duplicate data if found. Here you can perform two different actions.
- Merge – To combine the duplicate records.
- Delete – To remove the duplicates.
In this way, you can easily eliminate duplicates in Joforce CRM.
Merging two record #
Joforce CRM enables you to merge any two records of a module. In case of duplicate or two similar records with the same info, you can merge them using the following steps.
- Click on the Merge selected records option
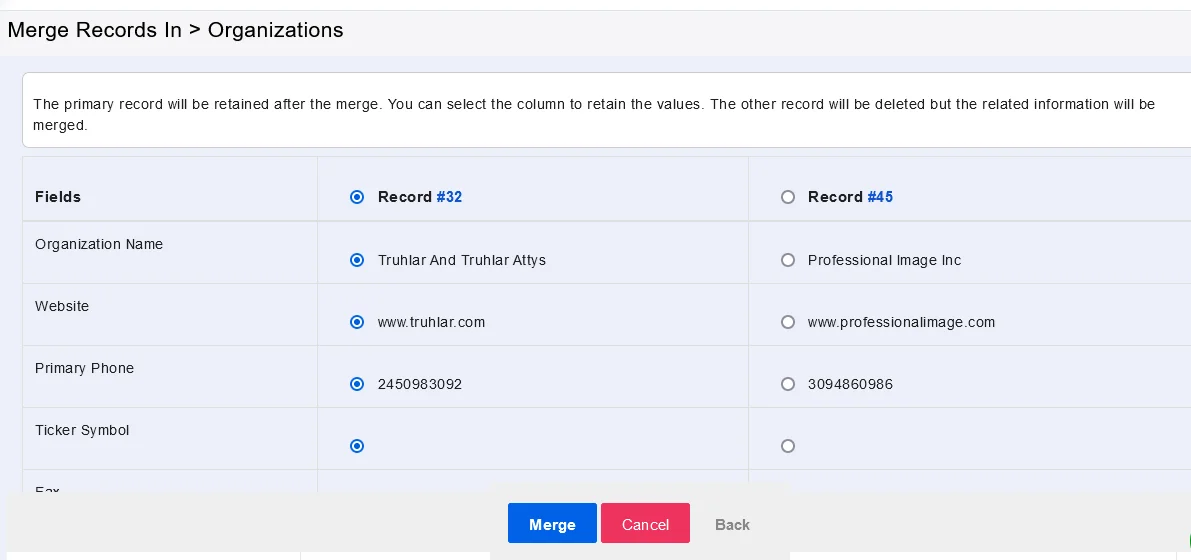
- In the Merge Records overlay, it displays the Module fields and the related information of the two selected records.
- After merging, the primary record information is retained by default.
- You can select the columns that you need to retain from another record.
- Finally, click on Merge.
- Ex: Consider the below two records information.
- By default, the primary(first) record information is selected.
- You can select the column of the second record that you need to retain.
Assigning a record to a Joforce CRM user #
Joforce CRM lets you assign the records to different users or to specific groups. To assign records,
- Click on Transfer Ownership
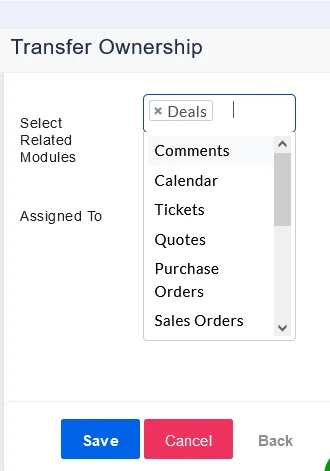
- In the Transfer Ownership overlay,
- You can choose the modules related to the record in the Select Related Modules
- Now choose the desired user from the Assigned to drop down.
Finally, click on Save.
Adding tags #
Joforce CRM lets you add tags, which helps you to group related records in a module. And tags give an easy way to access the specified record info. To add tags to your records,
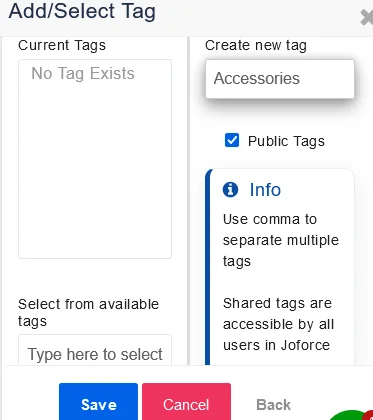
- Click on Add tag, in the Add/ Select Tag overlay,
- It displays all the currently enabled tags on the left side, to add new
- Either you can select any one of the available tags using the Select from available tags option
- Or you can create a new tag using the Create new tag on the right side.
- To make your new tag public(i.e. Available to all users) enable the checkbox.
- Now click on Save.
You can also add a tag
Admin users can also do the same by navigating via
- Profile icon → Settings → My Preferences → My Tags → Add Tag
Editing the header column menu in the List view of a module #
In Joforce CRM, you can add or delete any header menu in the list view of the module. You can use the menu that wants to appear in the listview header. To do so,
- Navigate to the desired module
- Click on the box icon in the right corner of the header menu
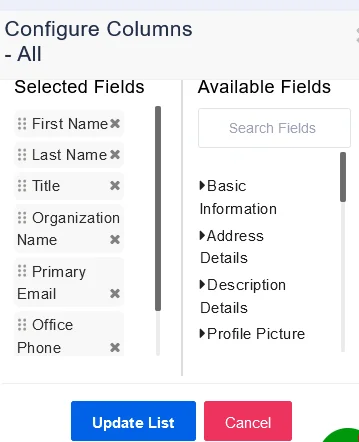
- A Configure Columns overlay opens,
- The header menu that is currently enabled is displayed on the left side
- And the remaining menus are listed on the right side, you can use one among them to add new.
- To delete the existing one, click on the x icon beside the header menu
Finally, click on the Update List.
Sorting(ascending/ descending) the records in the module list view #
It is easy to sort the record information in Joforce CRM. To do so, #
- Navigate to the module
- Double click on the menu to sort the values.
Making calls from Joforce CRM #
With the built-in phone option in Joforce CRM lets, you make calls to your customer from Joforce CRM. Configure your PBX Manager and start making calls,
- Navigate to the desired record’s detailed view
- Click on the client’s Phone number and connect with your client right away.
- All call info is automatically recorded, to get it to click on the PBX Manager icon and get the complete call information.

